Pages

mardi 30 janvier 2018

Castle of Breze - Lindy's Gang DT

Bonjour à toutes,

Aujourd'hui je suis sur le blog de Lindy's Gang avec un pas-à-pas. J'ai choisi de tavailler dans mon Castle's Journal que k'ai commencé il y un moment déjà, mais j'ai été trop occupé pour avoir une chance de m'amuser avec. La château que j'ai choisi aujourd'hui est le château de Brézé (Vallée de la Loire, France).

Hello Sweeties

Today I'm up on Lindy's Gang blog with a step-by-step project. I chose to work on my Castle's Journal that I started some time ago, but I was to busy to have a chance to play with it. The castle I'm working on today is the Castle of Brézé (Loire Vallée, France)


J'ai commencé par coller des morceaux de pages avec du gel mat.
Une fois contente du résultat, j'ai recouvert toute la page avec du gesso blanc.

I started to glue some book pages with a soft matte gel. 
When happy with this first step, I covered the whole page with white gesso. 


Ensuite, j'ai ajouté un motif à l'aide d'un pochoir et de pâte à craqueler blanche. Je ne voulais pas un motif trop net, j'ai donc ajouté plus de pâte à craqueler à certain endroit et effacer partiellement le otif. J'ai laissé sécher naturellement pour obtenir de belles craquelures. Mais si comme moi, vos radiateurs sont allumés (c'est l'hiver ici), vous pouvez placer votre projet près du radiateur pour accélérer le processus.
C'est maintenant qu'on s'amuse : il est temps d'ajouter de la couleur. J'ai décidé d'utiliser trois couleurs de Magical. La première que j'ai utilisé est Afternoon Delight Denim, qui est conditionné dans un shaker,  j'ai saupoudré un peu de Magical là ou je voulais la couleur et je l'ai activé avec de l'eau. J'ai juste bouger un peu ma feuille pour permettre à la couleur de bouger. J'ai séché l'encre avant d'ajouter la prochaine couleur.

Next, I added a design with a stencil and white crackle paste. I didn't want the design to be too precise, so I added more crackle paste in some area and in doing so, remove some of the design. And let it dry naturally in order to obtain some nice cracks. If like me your heater is on (it's winter in France), you can place your project near the heater to sped up the process.
And now the fun really began: time to add some color. I decided to use three colors of Magical. The first one I applied was the Afternoon Delight Denim that came in a Magical Shaker, I sprinkled some Magical where I want the color and sprayed some water to activate it. I just move my page to help the color to move. I dried the ink before adding the next color.


Ensuite j'ai ajouté Grab a Guy Gold, qui comme la précédente est en shaker. Pour ajouter Steampunk Sepia, j'ai utilisé mon pinceau pour saupoudrer la poudre là où je la souhaitais et j'ai vaporisé avec de l'eau. UNe fois contente du résultat, j'ai tout séché avec mon heat gun.
J'ai embossé des morceaux de chipboard avec la poudre Twilight Blue Slate.

Next, I added some Grab a Guy Gold Magical, which like the previous came in a shaker. To add the Steampunk Sepia, I used my brush to add the Magical powder where I wanted to be and sprayed with water. When I was happy with the result, I dried everything with my heat gun.
I embossed some pieces of chipboard with the Twilight Blue Slate EP.


J'ai tamponné ici et là. Et pour finir le fond j'ai ajouté des tâches noires.
Ensuite, j'ai ajouté de la dentelle, des pages de livres, du sachet de thé et des embellissements métalliques sans oublié la photo. Et voilà !

I added some random stamping. And to finish the background I added also some black splatters.
Next, I added some lace, book's page, tea bag, and some metal embellishments without forgetting the photo. And that's it!


Et voici quelques gros plans de la page terminée :

Here are a few close-ups of the finished page:


Matériels / Materials:

Lindy's Gang products:

Afternoon Delight Denim Magical Shaker
Afternoon Delight Denim
Grab a Guy Gold Magical Shaker
Grab a Guy Gold
Industrial Chic- MAGICAL Shimmer Powders
Industrial Chic Shimmer Magical
Twilight Blue Slate
Twilight Blue Slate EP

Other products:
  • Stamp - 49 ad Market (Pascale's Grammar);
  • Stencil - Prima (Foliage Lover);
  • Art Extravagance - Finnabair Prima (White Crackle Paste);
  • Art Basics - Finnabair Prima (Heavy White Gesso, Soft Matte Gel)

vendredi 26 janvier 2018

Le Mont Saint Michel - Maja Design DT

Bonjour à toutes,

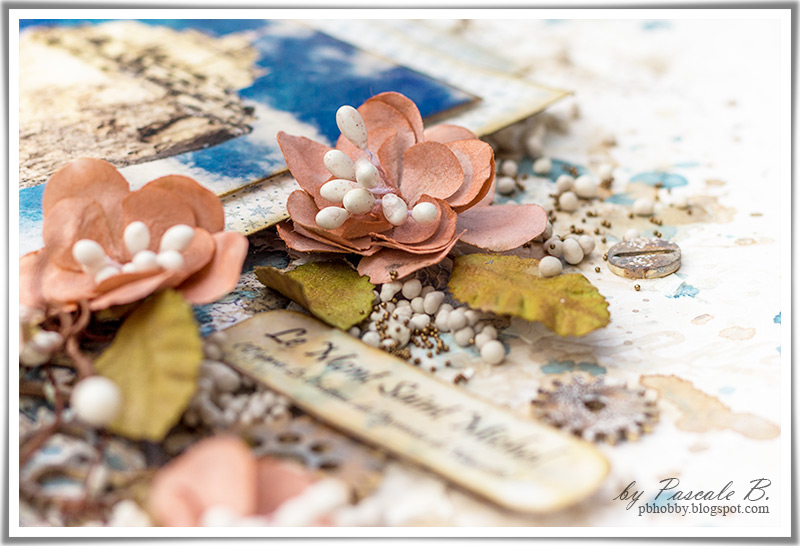
Aujourd'hui je suis sur le blog de Maja Design avec une nouvelle page réalisée avec la collection Joyous Winterdays. J'ai choisi un photomontage que j'ai réalisée, inspiré du Château des Pyrénes de René Magritte. Oh ! j'oubliais de vous dire qu'il y a une vidéo pour voir comment j'ai réalisée cette page et n'oubliez pas que vous pouvez gagner la nouvelle collection ici.

Hello Sweeties

Today I'm up on Maja Design blog with a new layout featuring the Joyous Winterdays collection. I chose to work with a photomontage I've made, inspired by The Castle of The Pyrénée by René Magritte. Oh, I forget to tell you that there is a step-by-step video showing you how I make this layout and don't forget that you still can win the new collection there.


J'ai tamponné ici et là le fond avec une encre Archival noire et deux de mes tampons  : Pasale's Form et Pascale's Grammar . Puis j'ai recouvert le fond de gesso transparent.

I stamped randomly the background with two of my stamps Pascale's Form and Pascale's Grammar with a black Archival ink. Next, I primed the background with clear gesso.


Une fois sec, j'ai utillisé plusieurs tampons pour ajouter de la couleur au fond avec plusieurs encres. J'ai terminé avec des taâches faites avec ces mêmes encres. Une fois contente du résultat, j'ai ajouté un motif à l'aide d'un pochoir et de pâte à craqueler blanche.

When dry, I used different stamps to add some color to the background with different inks. I finished with splatters of the same inks. When happy with the result, I added a design with a stencil and white crackle paste.


Pendant que la pâte à craqueler séchait, j'ai coloré le chipboard avec des Magicals. Je les ai ensuite saupoudré avec une poudre à embosser pour donner un peu de texture.

While the paste was drying, I colored the Archival board with Magicals. Next, I sprinkled them with an embossing powder to add some interest.


J'ai coloré les fleurs avec deux encres: une pêche, l'autre vieux rose.

I colored the flowers with two inks: one peach, one vintage rose. 


J'ai coupé quelques papiers pour ajouter sous la photo et j'ai collée les embellissements avec un gel 3D. POur terminer la mise en page j'ai ajouté des Art Stone et des microbilles.

I cut a few papers to add under the photo and I glue all the embellishments with a 3D gel. To finish the layout I added some Art Stone and microbeads.


Et voici la video / And here is the video link:


Matériels / Materials:

Maja Design products:


Ephemera bs
Ephemera bs
Sparkle
Sparkle
Blizzard bs
Blizzard bs
949-Paper-pack-Joyous-Winterdays-w
6x6 pad

Other products:
  • Flowers - 49 and Market (Garden Blooms: Alabaster; Garden Vine: Alabaster);
  • Archival Board - 49 and Market (Timeless White);
  • Stams - 49 and Market (Pascale's Grammar, Pascale's Grammar, Gabi's Herbaceous, Gabi's Sunshine);
  • Starburst - Lindy's Stamp Gang (Whale Watch Blue, Creme Brulee Cream, Fuzzy Navel Peach, Bodacious Blush);
  • Moon Shadow - Lindy's Stamp Gang (Long John's Silver);
  • Magical - Lindy's Stamp Gang (Industrial Chic Set);
  • Stencil - Finnabair Prima (Stars);
  • Art Ingredients - Finnabair products (Microbeads: );
  • Art Extravagance - Finnabair products (White Crackle Paste, Art Stone);
  • Art Basic - Finnabair products (Clear Gesso, 3D Gloss Gel, Soft Matte Gel).

Did you know Maja Design is on Social Media?

Pinterest: Did you know that Maja Design has a Pinterest Page? You can find it right here.
Facebook: You can follow us on Facebook right here and of course "LIKE" us.
Instagram: Maja also has an Instagram account – majadesigninsweden.
(Use the hashtag #majadesigninsweden or the tag @majadesigninsweden
with your Maja papers so we can find you.)
YouTubehttps://www.youtube.com/user/MajaDesignChannel

mardi 23 janvier 2018

Moodboard - Maja Design DT

Bonjour à toutes,

Aujourd'hui c'est un set de 3 cartes que je veux vous montrer, qui suis le tableau d'inspartion de Maja Design.
Et pour rappel vous pouvez encore gagner cette collection ici.

Hello Sweeties

Today  I have a set of three cards to share with you, inspired by the Mood Board from Maja Design.
And just a reminder, that you still can win this collection here.


J'ai réalisé des cartes très simples qui peuvent facilement se glisser dans une enveloppe.

I make some simple cards which would fit easely in a envelope.


J'ai coupé les cartes dans la collection Monochrome Shades of Celebration.

I cut the card bases in the Monchromes Shades of Celebration.


J'ai coupé quelques papiers ainsi que les modèles dans le pack 6x6 de la collection Celebration.

I cut some papers as well as the ladies in the 6x6 Celebration paper pack.


Après avoir collé les quelques papiers, j'ai juste ajouté quelques fleurs et un peu de dentelle.

After gluing the papers, I just added a few flat flowers and some scraps of doilies.


How to participate?

♥ Create anything you’ll like – a layout, a card, something altered or maybe a canvas. Use Maja papers primarily! Take a nice picture of it and send it to moodboard@majadesign.nu. We also need to know your full name, address, and a phone number. Please specify what collection you would like to win if you are the lucky one. We will also want to know if you would like it in the size 12*12 or 6*6. Please send us the pictures in the size of 800 pixels on the width. We would be so grateful if you also could change the file name of the photo to your first and last name including your country.

♥ Feel free to send us more than one picture, from different angles or some close-ups – or why not more than one project?

♥ Publish the project/s on your blog (or/and any social media, e.g. Facebook, Instagram, Pinterest) with a link to our site. Please also add the image of the mood board.

♥ Feel free to combine your entry with other challenges.

♥ The winner will be revealed the last Monday each month, at the Maja blog. The winner will be sent one collection by their choice, and also a digital Winner’s Badge to use and brag with.


Matériels / Materials:

Maja Design papers:


Muted Fuschia

Lavender Rose

Vintage Teal

6x6 Pack


lundi 15 janvier 2018

Justine + Giveaway - Maja Design DT

Bonjour à toutes,

Je vous souhaite à toutes une très bonne année 2018 pleine de bonheur, de joie et de créativité. Pour bien commencer cette année, je vous propose de gagner la collection Celebration de Maja Design. Cette collection est très spéciale puisque Maja Design fête ses 10 ans. Vous pouvez y croire ?
Quand j'ai vu cette collection, j'ai immédiatement pensé à cette photo de ma grand-mère paternal prise dans les années 20 !

Hello Sweeties

I wish you all a happy new year 2018 full of happiness, joy, and creativity. To begin this new year, I have a giveaway for you: you can win the Celebration collection from Maja Design. This collection is very special as Maja Design is celebrating his 10th anniversary. Can you believe it?

When I saw the collection, I immediately thought about this photo of my paternal grandmother taken in the twenties!


J'ai utilisé deux tampons avec deux encres pour ajouter un premier motif. A ce propos, l'un des tampons que j'ai utilisé est un extrait de l'acte de mariage des parents de ma grand-mère. Puis, j'ai protégé le fond avec une couche de gesso.

I used two stamps with two inks to add the first design. One little anecdote, one of the stamps I used is, in fact, an extract of the marriage certificate of my grandmother's parents. Next, I primed the background with clear gesso.


Une fois le gesso sec, j'ai ajouté un motif à l'aide d'un pochoir et de deux pâtes : la pâte Graphite et le pâte Brown Rust.

When the gesso was dry, I added a design with a stencil and two pastes: the Graphite paste and the Brown Rust paste.


Pendant que les pâtes séchaient, j'ai découpé quelques feuilles dans du papier aquarelle. Je les ai peintes avec plusieurs encres ainsi que les fleurs.

While the pastes were drying, I die cut some leaves in a watercolor paper. I colored them with different inks as well as flowers.


Puis, j'ai coupé quelques papiers pour lettre sous la photo et avant de coller tous les embellissements, j'ai coloré le fond avec différentes encres.

Next, I cut a few papers to add under the photo and before gluing all the embellishments I colored the background with different inks.


Pour terminer la mise en page, j'ai ajouté des flocons de mica et des glitter.

To finished the layout, I added some mica flakes and glitter.


Pour gagner la nouvelle collection de Maja Design Celebration, il vous suffit de :
1. Suivre mon blog (à l'aide de blogger, bloglovin ou par email si ce n'est pas le cas)
2. Suivre le blog de Maja Design (par email)
3. Aimer la page Facebook de Maja Design (ici)
4. et utiliser le Inlinkz pour ajouter votre nom ci-dessous.
J'aimerai bien savoir ce que vous penser des papiers Maja Design, alors laisser un petit mot dans ce sens. :)

To stand a chance to win this giveaway, you have to:

1. Become a follower of my blog (subscribe via blogger, bloglovin or email if you're not)
2. Become a follower of the Maja Design blog (subscribe via email)
3. Like Maja Design on Facebook (here)
4. And link your name on the link below.
I would really appreciate reading your thoughts about Maja papers so that would be nice too. :)


Matériels / Materials:

Maja Design papers:


Celebration

Welcome

Entertainement

6x6 Pad

Other products:
  • Starburst - Lindy's Stamp Gang (Whale Watch Blue, Tainted Love Teal, Wild Honey Suckle Coral);
  • Flat Fabio - Lindy's Stamp Gang (I'm Late I'm Late I'm Late, C'est la Vie Cerise );
  • Stamps - 49 and Market (Pascale's Form, Pascale's Grammar);
  • Flowers - Wild Orchid Craft (English Roses);
  • Dies:
    • Memory Box ( Honey Blossom);
    • Poppystamp (Leafy Sprig);
    • Magnolia DooHickey (Rose Leaf);
  • Stencil - Stamper's Anonymous (Flourish);
  • Art Ingredients - Finnabar Prima (Glitter - Luminous Set, Mica Flakes - Gold);
  • Art Extravagance - Finnabair Prima (Rust Effect, Graphite);
  • Art Basics - Finnabair Prima (Clear Gesso, Soft Matte Gel, 3D Gloss Gel).
 

jeudi 11 janvier 2018

La Tour Folle - 49 and Market DT

Bonjour à toutes,

Aujourd'hui je suis sur le blog de 49 and Market avec une page réalisée avec la collection Vintage Artistry et je dois avouer que c'est l'un de mes préférée. J'ai choisi de travailler avec un photommontage que j'ai réalisé, inspiré de La Folie d'Almeyer de René Magritte.

Hello Sweeties,

Today I’m up on 49 and Market blog with a layout the classic collection Vintage Artistry and may I said one of my favorite. I worked with a photo montage I've made inspired by the Almeyer's Folie by René Magritte.


J'ai tamponné ici et là avec deux tampons et deux encres. En fait, ce n'est pas si aléatoire que ça, puisque j'ai tamponné dans la zone qui sera autour de la photo. Une fois contente du résultat, j'ai protégé le fond avec du gesso transparent.

I stamped randomly with two stamps and two inks. Well, in fact, it isn't really random as I've stamped around the place my photo will be. When happy, I primed the background with clear gesso. 


Ensuite, j'ai ajouté un motif à l'aide d'un pochoir et de pâte à craqueler blanche. Je l'ai laissé sécher naturellement avant d'ajouter un second motif avec  un autre pochoir et de la peinture Unicorn's Hair.

Next, I added a design with a stencil and white crackle paste. I leave to dry naturally before I added a second design with another stencil and Unicorn's Hair paint.


Puis j'ai ajouté de la couleur au fond pour rappeler celles de la photo.

The next step was to add some colors to the background to remind the colors of the photo. 


Puis j'ai altéré la grille avec une encre brune et la peinture Unicorn's Hair, et les feuilles de fougères avec de l'encre brune. J'ai coupé des branches dans du papier aquerelle et je les ai coloré avec de la cire.

I altered the mesh with a brown ink and the Unicorn Hair paint and the fern leave with the brown ink. I die cut some berry branches in a watercolor paper and altered them with waxes.


J'ai coupé quelques papiers pour mettre sous la photo et j'ai collé tous les embellissements. J'ai ajouté aussi de la mousse.

I cut a few papers to add under the photo and I glued all the embellishments. I added some moss


Pour finir la mise en page, j'ai ajouté des microbilles.

To finish the layout, I added some microbeads.

Matériels / Materials:

49 and Market products:

Tattered VA 4550
Vintage Artistry
Tattered
Vintage Artistry 6x6 Paper Pack
Vintage Artistry
6x6 paper pack
CB-86080 Cottage Blooms - Linen
Cottage Blooms
Linen
GS-86318 Garden Seeds - Linen
Garden Seeds
Linen
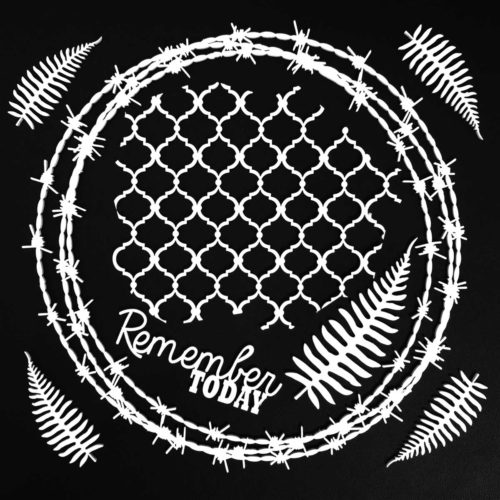
AB-86745 6x6 Archival Board - Remember Today (White)
Archival board
Remember Today
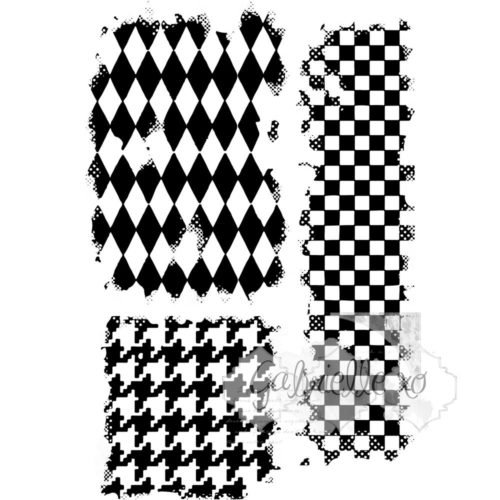
Pattern Textures
Gabi's Patterned Textures
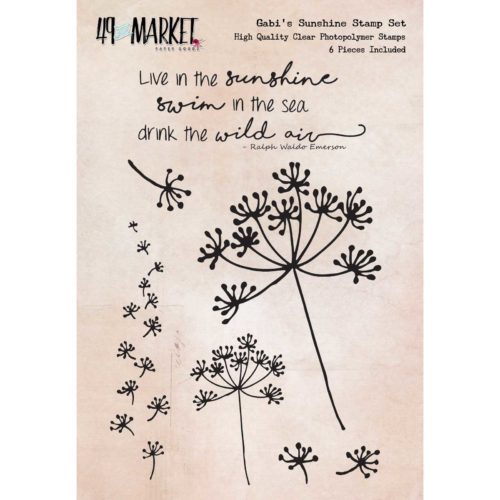
GP-86684 Gabi's Sunshine Stamp Set (4x6)
Gabi's Sunshine
PB-86646 Pascale's Grammar Stamp (3x4)
Pascale's Grammar

Other products:
  • Starburst - Lindy's Stamp Gang (Tainted Love Teal, Whale Watch Blue, Azure Sae Asters);
  • Moon Shadow - Lindy's Stamp Gang (Silhouette Silver);
  • Stencils:
    • Echopark (Quilted Stich);
    • Carabelle Studio (Courrier);
  • Art Ingredients - Finnabair Prima (Microbeads - Bronze);
  • Art Alchemy - Finnabair Prima (Sparks - Unicorn's Hair, Wax - Mystic Turquoise);
  • Art Extravagance - Finnabair Prima (White Crackle Paste);
  • Art BAsics - Finnabair Prima (Clear Gesso, Soft Matte Gel, 3D Gloss Gel).