
Bonjour à toutes,
Aujourd'hui c'est une nouvelle page pour A.B. Studio que je vous propose réalisée avec la collection Emerald Queen.
Hello Sweeties,
Today I have a new layout for A.B. Studio to share with you featuring the Emerald Queen collection.
Aujourd'hui c'est une nouvelle page pour A.B. Studio que je vous propose réalisée avec la collection Emerald Queen.
Hello Sweeties,
Today I have a new layout for A.B. Studio to share with you featuring the Emerald Queen collection.

Processus / Basic process:
- Découper une bande de papier aquarelle et ajouter un motif avec le pochoir n°66 et du gel 3D mat;
Cut a strip of watercolor paper and add a design with stencil ID-66 and 3D Gloss Gel; - Découper un morceau du chipboard n°20 et le peindre avec la Sparks Unicorn's Hair ;
Cut a piece of the chipboard ID-20 and paint it with Unicorn's Hair Sparks; - Ajouter un motif avec le pochoir n°66 et de la pâte à craqueler transparente ;
Add a design with the stencil ID-66 and clear crackle paste to the background;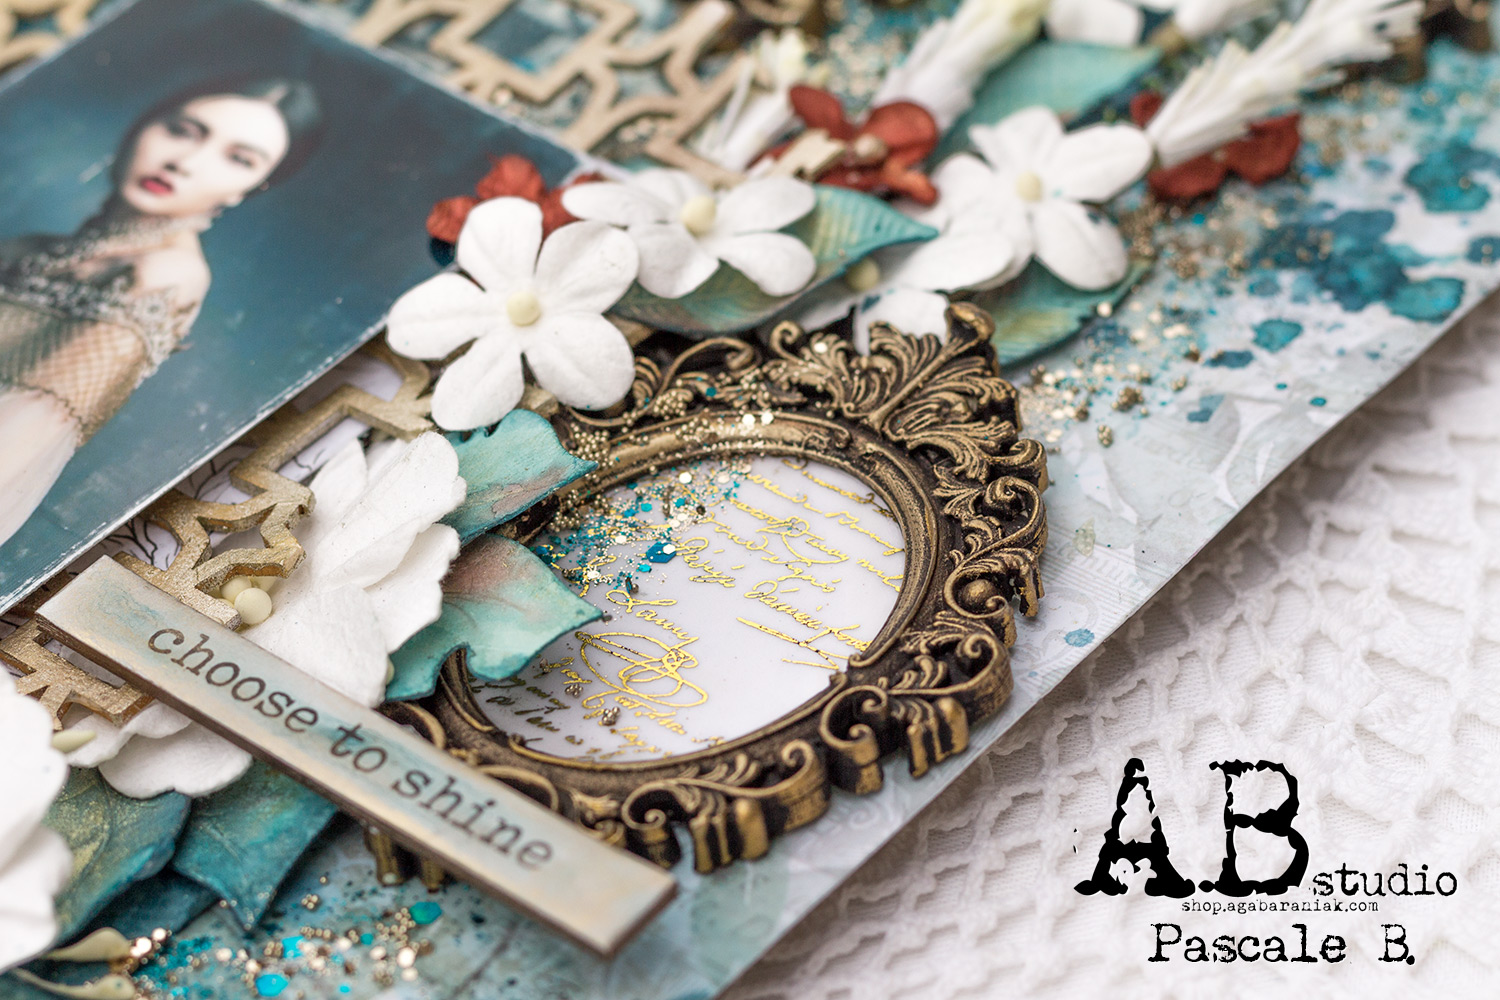
- Colorer la bande de papier aquarelle avec les Magicals Stormy Sky, Jana's Jade, etTainted Love Teal et l'encre Cobawanga Copper ;
Color the paper strip with Stormy Sky, Jana's Jade, and Tainted Love Teal Magical and Cobawanga Copper ink; - Colorer le fond avec les mêmes couleurs ;
Color the background with the same colors;

- Peindre quelques élements en résine avec du gesso noir, puis colorer les avec les cires Bronze Age, Vintage Gold et White Gold ;
Prime some resin elements with black gesso, then color them with Bronze Age, Vintage Gold and White Gold waxes; - Recouvrir de feuille Rich Gold sur le texte du papier calque n°0001 ;
Add some Rich Gold foil to the text from the Tracing Paper 0001; - Découper quelques feuilles dans du papier aquarelle et colorer les avec les couleurs précédentes et Gleaming Gold magical ;
Die cut some leaves in a watercolor paper and color them with the previous colors and Gleaming Gold;

- Découper un morceau de la feuille Wide Eye pour ajouter sous la photo ;
Cut a piece of the Wide Eyed paper to add under the photo; - Coller tous les embellissements avec du gel 3D mat ;
Glue all the embellishemnts with 3D Matte Gel;

- Ajouter des tâches avec Tainted Love Teal et Stormy Sky ;
Add splatters with Tainted Love Teal and Stormy Sky; - Tamponner autour de la composition avec le tampon n°208 ;
Stamp around the composition with stamp ID-208; - Ajouter glitters et microbilles ;
Add glitters and microbeads; - Et finalement, ajouter des petites fleurs colorées avec l'encre Cowabunga Copper pour ajouter du contraste.
And finally, add some tiny flowers colored with Cowabunga Copper ink to add some contrast.


J'espère que vous aimerez cette vidéo / I hope you will enjoy the video:
Matériels / Materials:
A.B. Studio products:
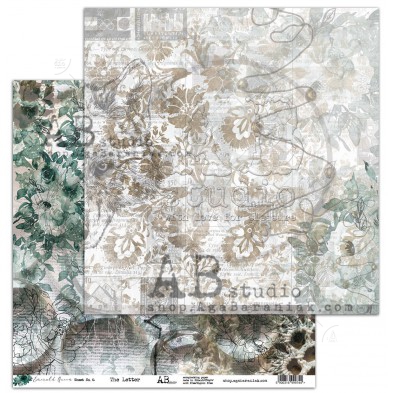
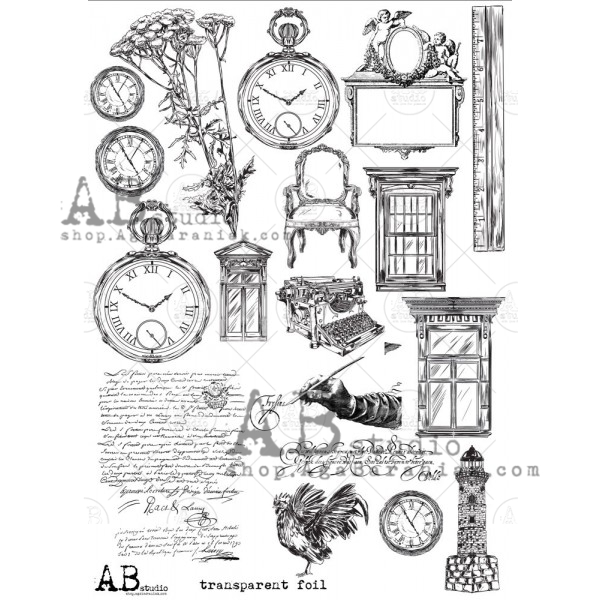
Emerald Queen The Letter |
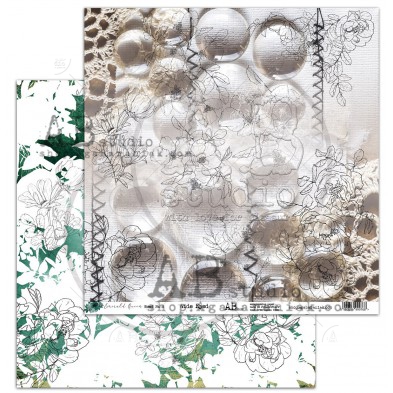
Emerald Queen Wide Eyed |
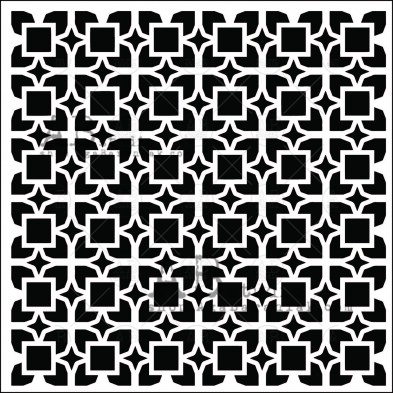
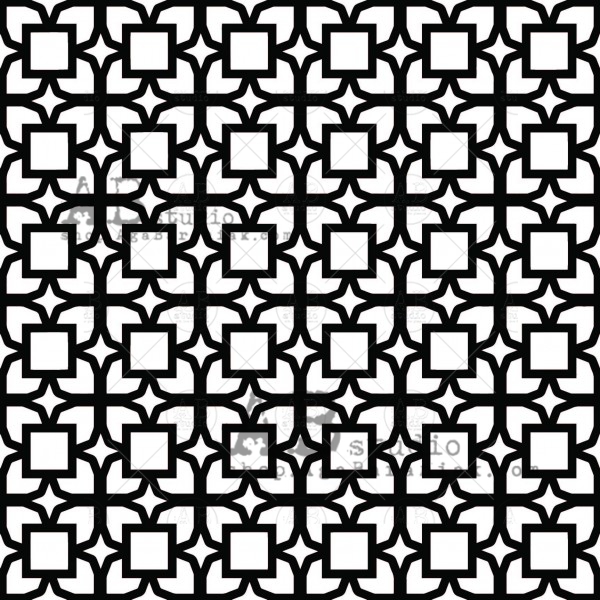
Stencil ID-66 |
 Chipboard ID-20 |
||||||||
Stamp ID-208 |
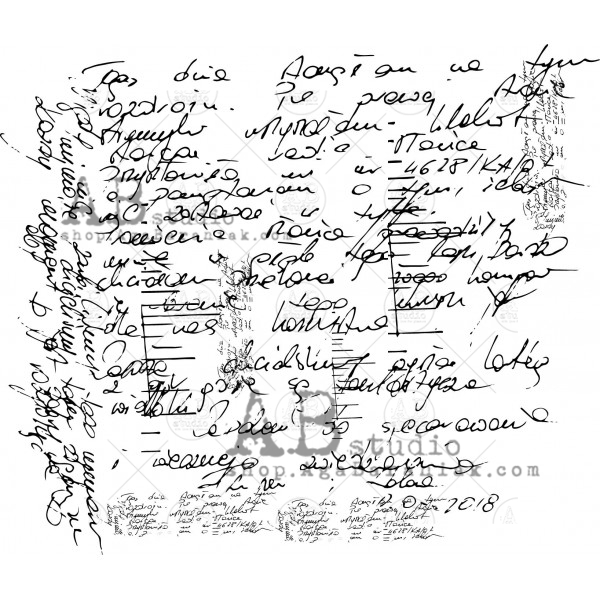
Tracing Paper 0001 |
Creative Foil Rich Gold |
|||||||||
- Flowers - 49 and Market (Wildflowers: Clouds);
- Starburst - Lindy's Gang (Cowabunga Copper);
- Magical - Lindy's Gang (Stormy Sky, Jana's Jade, Tainted Love Teal);
- Glitzy Magical - Lindy's Gang (Gleaming Gold);
- Label - Idea-Ology ();
- Moulds - Re-Design Prima (Vincennes Hardware);
- Mould - Finnabair Prima (Annabelle);
- Art Ingredients - Finnabair Prima (Microbeads Set);
- Art Alchemy - Finnabair Prima (Sparks: Unicorn's Hair; Waxes: Bronze Age, Vintage Gold, White Gold);
- Art Extravagance - Finnabair Prima (Clear Crackle Paste);
- Art Basics - Finnabair Prima (Clear Gesso, 3D Matte Gel, Soft Gloss Gel).
Aucun commentaire:
Enregistrer un commentaire
Merci pour vos commentaires qui font chaud au coeur.
A très bientôt