mardi 19 juin 2018

Flaming Heart - Lindy's Gang DT

Bonjour à toutes,

Aujourd'hui je suis sur le blog de Lindy's Gang avec un nouveau projet. Une des mes amies m'a donné une mini palette que j'ai utlisé comme base pour mon projet.

Hello Sweeties

Today I'm up on Lindy's Gang blog with a new project. One of my friends give me a small pallet and I use it as the base for my Lindy's project.


J'ai commencé par recouvrir la palette avec deux couches de gesso blanc. Ensuite, j'ai collé quelques morceaux de napperon avec un gel 3D.
Puis j'ai également peint les morceaux de napperon avec du gesso.

First, I primed the pallet with two layers of white gesso.
Next, I glued a few pieces of a doily with a 3D gel and then, I covered the doily's pieces with gesso.


J'ai ajouté un motif à l'aide d'un pochoir et de plusieurs pâtes : j'ai utilisé Pumice, Limestone et White Sand. Je vulais obtenir plusieurs textures.
Et voici le résultat. J'ai de nouveau tout recouvert de gesso.

I added a design with different pastes: I used Pumice, Limestone and White Sand as I wanted to obtain different textures.
Just look at the beautiful result. I covered everything with another layer of white gesso.


Ensuite j'ai choisi différents embellissements : un cadre en plêtre cassé, un coeur en résine, et des fleurs.
J'ai collé tous les éléments avec un gel 3D and j'ai ajouté des Art Stones dans les trous. Une fois ous les embellissements en place et que plus rien ne bouger, j'ai peint le cadre et les fleurs avec du gesso blanc.

Next, I choose different embellishments: a broken plaster frame, a resin flaming heart, and flowers.
I glued all the elements with a 3D gel and filled the empty spots with Art Stones. When all the embellishments were in place and nothing was moving, I painted the frame and the flowers with the white gesso.


J'ai mélangé de la peinture acrilyque blanc nacré avec des Magicals : Bratwurst Brown et Guten Tag Teal. Et ce à ce moment que j'ai complétement oublié de prendre des photos tellement  j'étais prise dans le processus créatif. J'ai commencé par vaporisé des encres : Tainted Love Teal et ong John's Silver ainsi que de l'eau. Une fois contente du résultat, j'ai utilisé le mélange peinture/Magical pour ajouter plus de couleur. J'ai dilué la peinture avec de e'au pour obtenir une effet d'aquarelle. J'ai de nouveau vaporisé les encres Tainted Love Teal et Long John's Silver et ajouté encore plus de peinture jusq'à ce que je sois contente du résultat. Pour terminer, j'ai ajouté des touches d'encre Red Hot Poker Orange pour donner l'illusion de rouille.
Et voici le résultat.

To color the piece, I mixed a white pearl acrylic paint with Magicals: Bratwurst Brown and Guten Tag Teal. And that's the moment I was so taken by the creative process that I forget to take photos!
Spray two inks: Tainted Love Teal and Long John's Silver as well as water. When happy with the result, use the mix of white pearl acrylic and magical to add more color.
Then, dilute the paint with water to obtain a watercolor effect. Spray again with the Tainted Love Teal and the Long John's Silver inks and added more paints until happy.
To finish I added some Red Hot Poker Orange ink in some places to mimic rust.

And here is the result.


Quelques gros plans / Some close-ups:


Matériels / Materials:

Lindy's Gang products:

Tainted Love Teal
Tainted Love Teal
Red Hot Poker Orange
Long John's Silver
Long John's Silver
Guten Tag Teal Magical Shaker
Guten Tag Teal
Bratwurst Brown Magical Shaker
Bratwurst Brown

Other products:
  • Stencil - A.B. Studio (Stencil ID-28);
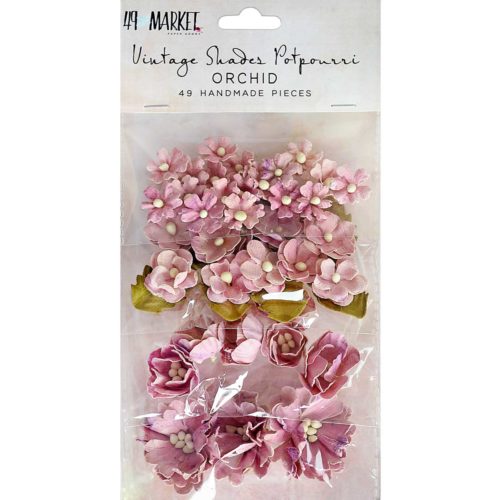
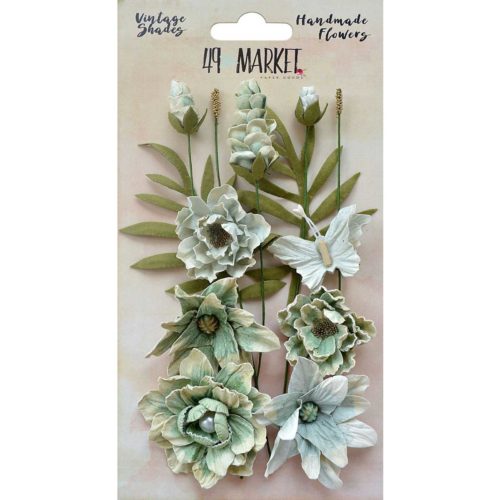
  • Flowers - 49 and Market (Basic Roses: White, Seaside Blooms: Cotton);
  • Archival Cast - Prima (Ancient Heart);
  • Art Alchemy - Finnabair Prima (Metallic: White Pearl);
  • Art Ingredient - Finnabair Prima (Art Stones, Mega Stones, Mini Stones);
  • Art Extravagance - Finnabair Prima (Stone Effect Paste, White Sand);
  • Art Basic - Finnabair Prima (White Gesso, Heavy Body Gel) ;

lundi 18 juin 2018

The Venitian Girl - 49 and Market DT

Bonjour à toutes,

Aujourd'hui je suis sur le blog de 49 and Market avec une nouvelle page réalisée avec la collection Vintage Artistry. J'ai choisi de ravailler avec une photo que j'ai prise lors d'un au château de l'Islette (Vallée de La Loire, France).

Hello Sweeties,

Today I'm up on 49 and market blog with a new layout featuring the Vintage Artistry collection. I chose to work with a photo I've taken during an event at the Château de l'Islette (Loire Valley, France).


J'ai commencé par protéger le fond avec du gesso transparent. Ensuite, j'ai ajouté plusieurs couleurs que l'ont retrouve dans la photo. Une fois contente, j'ai saupoudré du gros sel et du sel fin ici et là, et j'ai recouvert 'ensemble de film transparent. J'ai laissé le tout séché naturellment.

First I primed the background with clear gesso. Next, I added different colors that matched the photo. When happy, I sprinkled some coarse salt and some table salt on some part and  I covered everything with a piece of clingfilm. I let dry everything naturally.


J'ai vaporisé un papier aquarelle avec des encres jaune et verte que j'ai saupoudré de gros sel et de sel fin. Une fois sec, j'ai utilisé ce papier pour découper quelques feuilles.

I sprayed a watercolor paper with green and yellow inks and I sprinkled it with coarse and table salt. When dry, I used this paper to die cut a few leaves. 


J'ai coloré quelques fleurs Buttermilk pour rappeler le vert de la photo.

I colored some Buttermilk flowers to match the green color of the photo.


Une fois le fond sec, j'ai enlevé le film transparent et le sel. La combinaison des deux techiniques donne un trés beau résultat.

When the background was dry, I removed the clingfilm and the salt. The combination of both techniques gave a beautiful result.


Ensuite, j'ai découpé quelques éléments de la feuille Ephemera Cut Out pour ajouter sous la photo, j'ai collé du sisal et tous les embellissements. J'ai tamponné ici et là avec le tampon 1787.

Next, I cut some elements of the Ephemera Cut Out sheet to add under the photo, I glued some sisal and all the embellishments. I stamped here and there with the 1787 stamp.


Pour terminer la mise en page, j'ai ajouté des microbilles et des mini Art Stones.

To finish the layout, I added some microbeads and mini Art Stones.

Matériels / Materials:

49 and Market products:


Seeds of Love VA 4512
Vintage Artistry
Seeds of Love
Vintage Artistry Ephemera Cut Out Sheet VA 4574
Vintage Artistry
Ephemera Cut Out
AB-86745 6x6 Archival Board - Remember Today (White)
6x6 Archival Board
Remember Today - White
BP-87056-Botanical-Potpourri-Buttermilk
Botanical Potpourri
Buttermilk
VS-87131-Vintage-Shades-Potpourri-Orchid
Vintage Shades Potpourri
Orchid
VS-85984-Vintage-Shades-Cluster-Sage
Vintage Shades Cluster
Sage
PB-87506-1787-Pascale-Stamp
Stamp
1787

Other products:
  • Salt, Clingfilm;
  • Spray inks - Lindy's Gang (Aloha Avocado, Luminous Lemon, Jazzy Jivin Purple);
  • Magical - Lindy's Gang (Salt Water Taffy, Cathedral Pines Green);
  • Die - Memory Box (Botanical STem);
  • Art Ingredients - Finnabair Prima (Mini Art Stone, Microbead: Copper);
  • Art Basics - Finnabair Prima (Clear Gesso, 3D Gloss Gel, Soft Matte Gel).


dimanche 17 juin 2018

Blue Venus - Maja Design DT

Bonjour à toutes,

Aujourd'hui je suis sur le blog de Maja Design avec une nouvelle page réalisée avec la collection Vintage Summer Basics.

Hello Sweeties,

Today, I'm up on Maja Design blog with a new layout featuring the Vintage Summer Basic collection. I chose a photo of the Daum Venus aux Tiroirs by Salvador Dali. 


J'ai tamponné ici et là avec une encre grise avant de protéger le fond avec du gesso tranparent. J'ai également ajouté un légére couche de gesso blanc pour attéuer légéremen le bleu de la page.

I stamped here and there with a grey ink before priming the background with clear gesso. I added also a very thin layer of white gesso to tone down the blue. 


Ensuite, j'ai ajouté un motif à l'aide d'un pochoir et de pâte de papier. J'ai saupoudré la poudre encore humide avec deux poudres à embosser : une nacrée et l'autre argenté que j'ai embossé.

Next, I added a design with a stencil and Paper texture paste. While the paste was still wet, I sprinkle two embossing powders: one pearl, the other silver that I heat set. 


Puis j'ai ajouté un peu de couleur avec de l'encre noire, blanche et des micas acier pour ajouter un peu de contraste.

Then, I added some colors: black ink, white ink, and steel mica to add some contrast.


Pendant que les encres séchées, j'ai découpé quelques feuilles dans du papier aquarelle. J'ai coloré les plus grosses avec une encre bleue et je les ai embossé avec la poudre nacrée. J'ai recouvert les autres avec une feuille argent. J'ai également coloré quelques fleurs en bleue.

While the inks were drying, I die cut some leaves in a watercolor paper. I colored with a blue ink and embossed the big ones. I covered the other ones with a silver foil. I colored some flowers in blue.


J'ai coupé quelques papiers de la collection Home for the Holidyas pour mettre sous la photo. Puis j'ai tamponné ici et là avec un tampon texte avant de coller tous les embellissemens.

I cut some papers in the Home for Holidays collection to add under the photo. Before gluing all the embellishments, I stamped some text here and there with a black ink. 


Pour finir la mise en page, j'ai ajouté des microbilles et des glitters.

To finish the layout, I added silver microbeads and glitters.

Matériels / Materials:

Maja Design papers:


Vintage Summer Basics
1914 bs

Home for the Holidays
Love the snow bs

Home for the Holidays
Family

Other products:
  • Stamps - 49 and Market (Flowery Tiles, 1787);
  • Spray inks - Lindy's Gang (Bombshell Black, Frozen Jack Frost);
  • Magical - Lindy's Gang (Afternoon Delight Denim, Bavarian Blue, Shimmer Steel);
  • Embossing powders - Lindy's Gang (Silver Moon Mistletoe, Queen Sheeba Silver);
  • Flowers - WOC (Tuscany Rose, Aster);
  • Rub-on Foil - Prima (Shine On);
  • Die - Simply Graphic (Feuillage Vert);
  • Die - Magnolia DooHickey (Summer Foliage);
  • Stencil - Prima (Floral Petite);
  • Art Ingredients - Finnabair Prima (Microbeads: Silver; Glitters: Luminous);
  • Art Extravagance - Finnabair Prima (Paper Texture Paste);
  • Art Basics - Finnabair Prima (Clear Gesso, White Heavy Gesso, 3D Gloss Gel, Soft Matte Gel).


Did you know Maja Design is on Social Media?

Pinterest: Did you know that Maja Design has a Pinterest Page? You can find it right here.
Facebook: You can follow us on Facebook right here and of course "LIKE" us.
Instagram: Maja also has an Instagram account – majadesigninsweden.
(Use the hashtag #majadesigninsweden or the tag @majadesigninsweden
with your Maja papers so we can find you.)
YouTubehttps://www.youtube.com/user/MajaDesignChannel

lundi 11 juin 2018

1939

Bonjour à toutes,

Aujourd'hui c'est une page qui a été publiée dans le magasine sud-africain Scrap Affairs. Kyla m'a demandé d'écrire un article à propos du "clustering". Voici la page que j'ai réalisée avec une photo de mes grands-parents paternels prise vers 1939.

Hello Sweeties

Today, I want to share with you a layout which was published last year in the South African magazine Scrap Affairs. I was asked by Kyla an article about clustering. So here is my project with a photo of my paternal grandparents taken around 1939.


J'ai commencé par protéger le papier de fond avec du gesso transparent pour le protéger de tous les mediums et peintures que j'utilisera plus tard. Une fois sec, j'ai ajouté un motif avec de pâte à craqueler platine et d'un pochoir. J'ai choisi un moti de rose en mémoire du magnifique jardin de ma grand-mère. J'ai laissé la pâte sécher naturellement pour obetnr de belles craquelures.

I start to prime the background paper with clear gesso to protect it from all the medium and paints I will use later. When dry, I add a design with the platinum crackle paste and a stencil. I chose a stencil with a rose design in remembrance of the beautiful garden of my grandmother. I let the crackle paste dry naturally to obtain beautiful crackle.


J'ai ajouté quelques papiers sous la photo comme la page de livre. J'ai choisi de travailler avec un set de fleurs de 49 and Market et j'ai également découpé quelques feuilles. J'ai choisi une fougère pour rappeler celles du papier de fond.

I add some papers under the photo like an old book page. I chose to work with the set of flowers from 49 and Market and I die-cut some leaves. I chose a fern design to match the one from the background paper and some simple leaves. 


J'ai commencé par créer ma composition autour de la photo un groupe à la fois. J'ai mélangé les diverses fleurs et feuilles. Et j'ai continué jusqu'à ce que je suis contente du résultat.

I start to build my composition around my photo one cluster at the time. I mixed the different flowers and leaves. And I continued until I was happy with the result.


J'ai coloré toutes les fleurs ainsi que les feuilles avec Twinling H2Os. J'ai utilisé plusieurs tons de roses pour les fleurs, de vert et brun pour les feuilles.

I colored all the flowers as well as the leaves with Twinkling H2Os. I used several shades of pink to color the flowers, greens and brown to color the leaves. 


J'ai collé toutes les fleurs et les feuilles avec un gel 3D.

I glued all the flowers and leaves with a 3D gel. 


Puis, j'ai ajouté un peu de couleur  au fond. J'ai utilisé les mêmes couleurs que j'ai utilisé pour colorer les fleurs et les feuilles. Pour terminer la mise en page, j'ai mélangé ensemble des glitters or avec du gel medium et de l'eau et j'ai fait des tâches avec ce mélange de la même manière que j'ai fait des tâches avec les Twinkling H2Os. J'ai également ajouté des glass glitters.

Next, I add some color to the background. I use the same colors I've used to color the flowers and the leaves. To finish the layout, I mix together some gold glitter with a soft gel and water: I splattered the mixture like I've splattered the paints. I add also some glass glitter.

Matériels / Materials:
  • Papers - Vintage Artistry (Specimens, 6x6 pad);
  • Flowers - 49 and Market (Floral Mixology White);
  • Dies - Memory Box (Botanical Stem, Delicate Fern);
  • Twinkling H2O - ColourArte (Pink Grapefruit, Terracotta Rose, Rubilite, Burnt Umber, Moss Green, Golden Bamboo);
  • Art Ingredients - Finnabair Prima (Glitter: Luminous Set, Glass Glitter: Gold Rush);
  • Art Extravagance - Finnabair Prima (Platinum Crackle Paste);
  • Art Basics - Finnabair Prima (Clear Gesso, Soft Matte Gel, 3D Matte Gel).

mercredi 6 juin 2018

Battage 1950 - Maja Design DT

Bonjour à toutes,

Aujourd'hui je suis sur le blog de Maja Design avec une nouvelle page réalisée avec la collection Vintage Spring Basics . J'ai choisi une photo de famille prise à la ferme de mes grand-parents au moment du battage.

Hello Sweeties,

Today I'm up on Maja Design blog with a new layout featuring the Vintage Spring Basics. I chose a family photo taken at my grandparents' farm during the threshing. 


Et voici le tableau d'inspiration de ce mois de juin :


And here is the June's moodboard:


J'ai tamponné le fond avec un tampon avant de le protéger avec du gesso transparent. Ensuite, j'ai ajouté un motif à l'aide d'un pochoir et de pâtes à craqueler transparente et blanche, que j'ai laissé sécher naturellement.

I stamped the background with a stamp before priming it with clear gesso. Next, I added a design with a stencil and two crackle pastes: one clear, the other white.


Pendant que les pâtes séchaient, j'ai découpé divers éléments dans du papier aquarelle : des feuilles, des brindilles et des rouages. J'ai coloré toutes les découpes avec diverses encres et Magicals. J'ai également embossé quelques brindilles.

While the pastes were drying, I die cut different elements in a watercolor paper: some leaves, stems, and gears. I colored all the elements with different inks and magicals. I embossed also some of the stems.


J'ai découpé quelques papiers pour mettre sous la phoo ainsi que du sisal avant de coller tout les embellissements.

I cut a few papers to add under the photo as well as some sisal, before gluing all the embellishments.


Pour finir la mise en page, j'ai ajouté des microbilles.

To finish the layout, I added some microbeads.

Matériels / Materials:

Maja Design papers:


Vintage-Spring-Basics-P

6th of March

5th of March

10th of March bs

Other products:
  • Spray inks - Lindy's Gang (Whale Watch Blue, Azure Sea Aster, Green with Envy Green, Fuzzy Navel Peach, Blazing Black);
  • Magical - Lindy's Gang (Sea Grass Green, Steel Shimmer);
  • Embossing Powder - Lindy's Gang (Angel Wing Gold, Spanish Moss Green);
  • Stencil - AB Studio (Stencil ID-54);
  • Stamp - 49 and Market (Pascale's Form);
  • Die - Memory Box (Grape Vines);
  • Art Ingredients - Finnabair Prima (Microbeads: Splash, Green);
  • Art Extravagance - Finnabair Prima (Clear Crackle Paste, White Crackle Paste);
  • Art Basics - Finnabair Prima (White Heavy Gesso,3D Gloss Gel, Soft Matte Gel).
 

How to participate?

♥ Create anything you’ll like – a layout, a card, something altered or maybe a canvas. Use Maja papers primarily! Take a nice picture of it and send it to moodboard@majadesign.nu. We also need to know your full name, address, and a phone number. Please specify what collection you would like to win if you are the lucky one. We will also want to know if you would like it in the size 12*12 or 6*6. Please send us the pictures in the size of 800 pixels on the width. We would be so grateful if you also could change the file name of the photo to your first and last name including your country.

♥ Feel free to send us more than one picture, from different angles or some close-ups – or why not more than one project?

♥ Publish the project/s on your blog (or/and any social media, e.g. Facebook, Instagram, Pinterest) with a link to our site. Please also add the image of the mood board.

♥ Feel free to combine your entry with other challenges.

♥ The winner will be revealed the last Monday each month, at the Maja blog. The winner will be sent one collection by their choice, and also a digital Winner’s Badge to use and brag with.


Related Posts Plugin for WordPress, Blogger...