lundi 28 septembre 2020

Fierce - Mixed media layout for A.B. Studio

Bonjour à toutes,

Aujourd'hui c'est une page mixed media réalisée pour AB Studio que je souhaite partager avec vous. J'ai travaillé avec la superbe collection "In the Past". 

Hello Sweeties,

Today, it's a mixed media layout for A.B. Studio that I want to share with you. I work with the beautiful collection "In the Past".


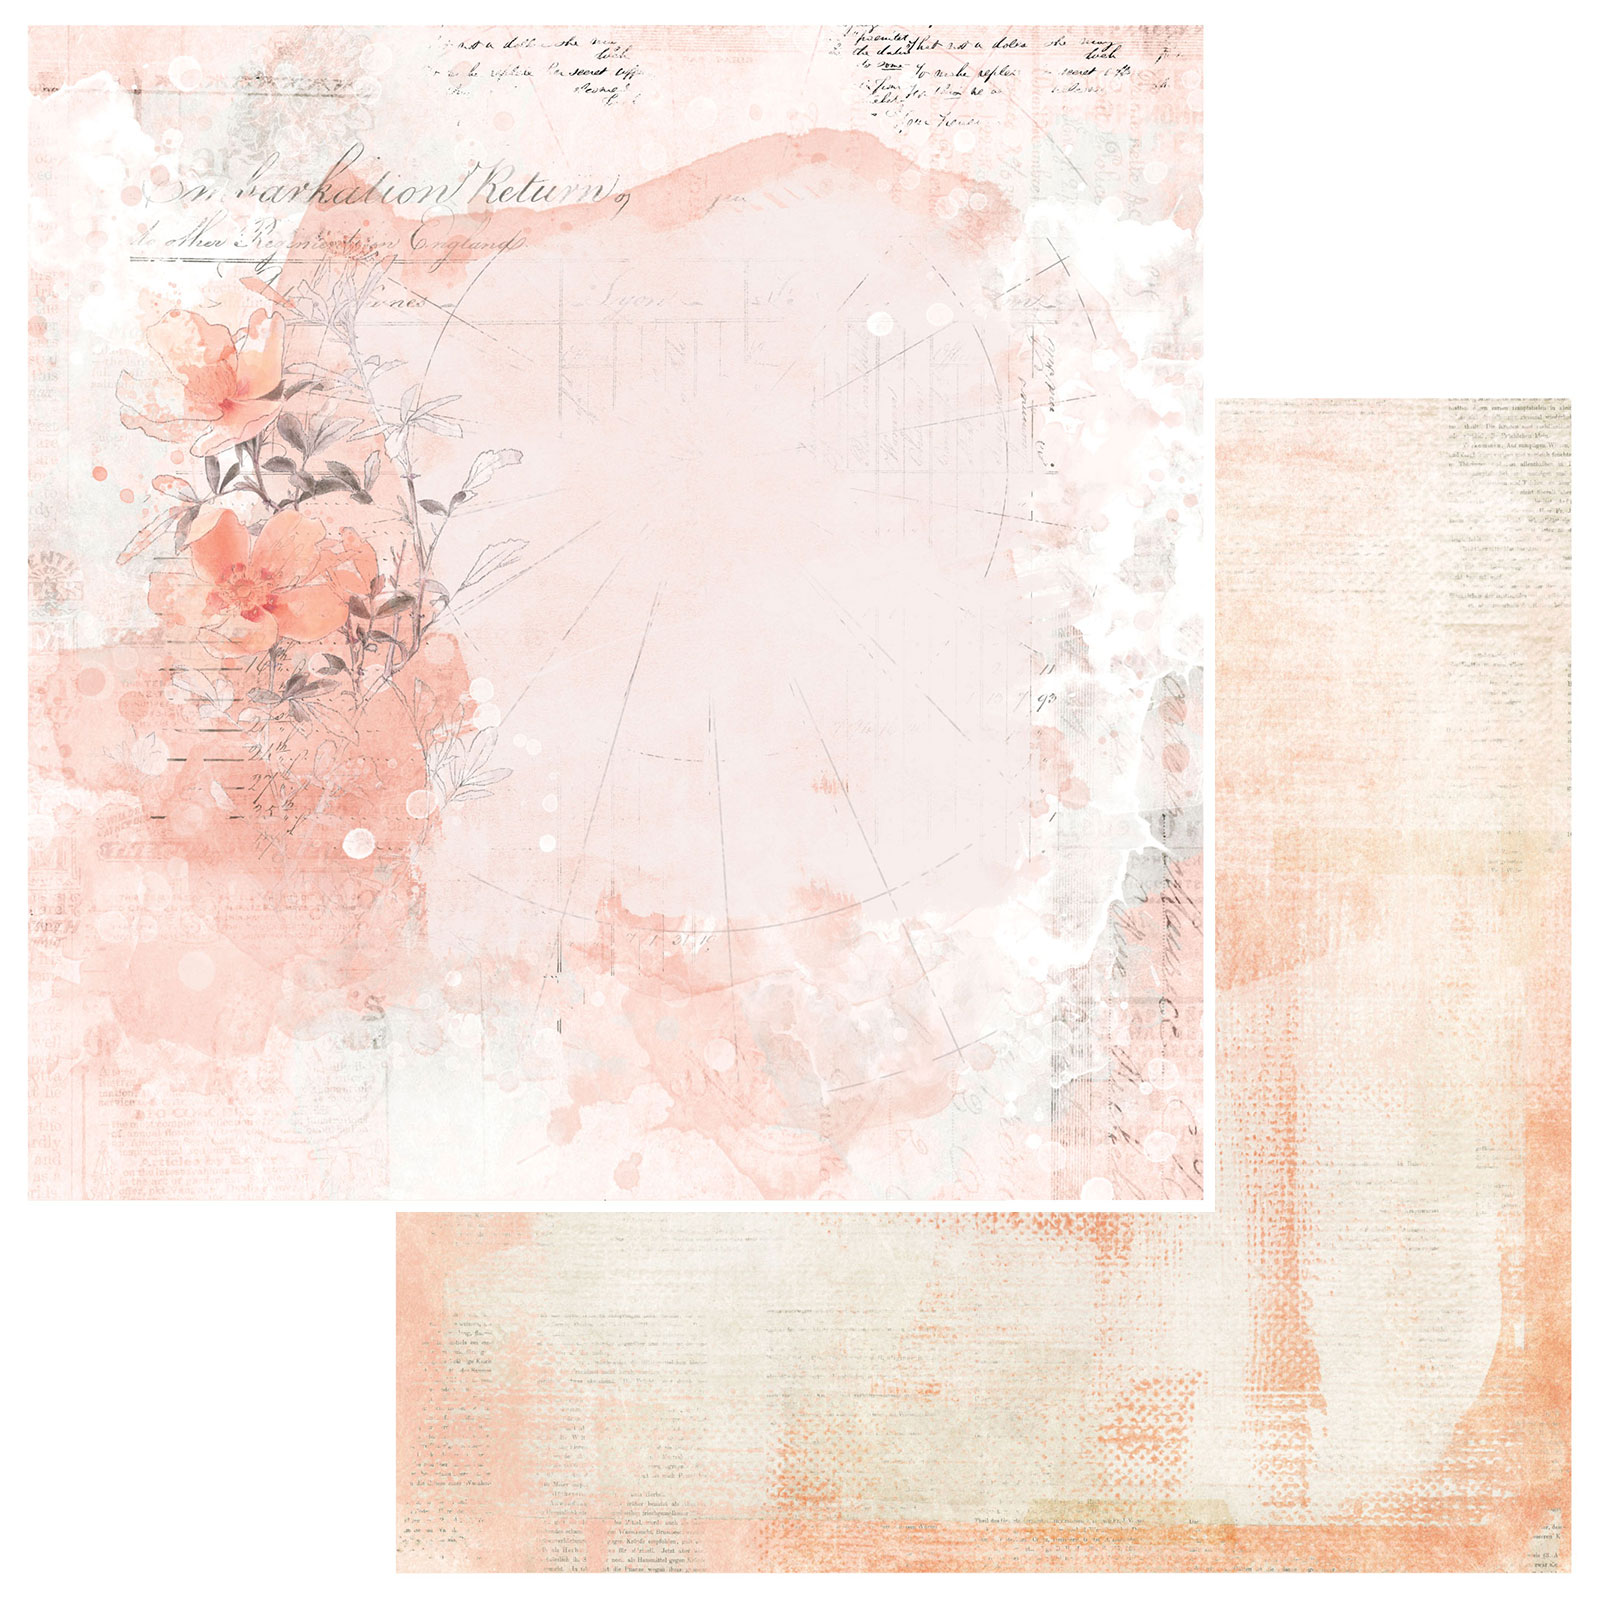
Avant tout j'ai protégé ma page de fond "Feeling Home" avec du gesso transparent. Une fois sec, j'ai déchiré la page en deux endroits opposés avant de la coller sur la feuille "Something Magical". J'ai aégalement ajouté du gesso transparent dans ces ouvertures. 

First, I primed the "Feeling Home" sheet with clear gesso. When dry, I tore the sheet in two opposite places before gluing it on the "Something Magical" sheet. I added clear gesso in the openings too.


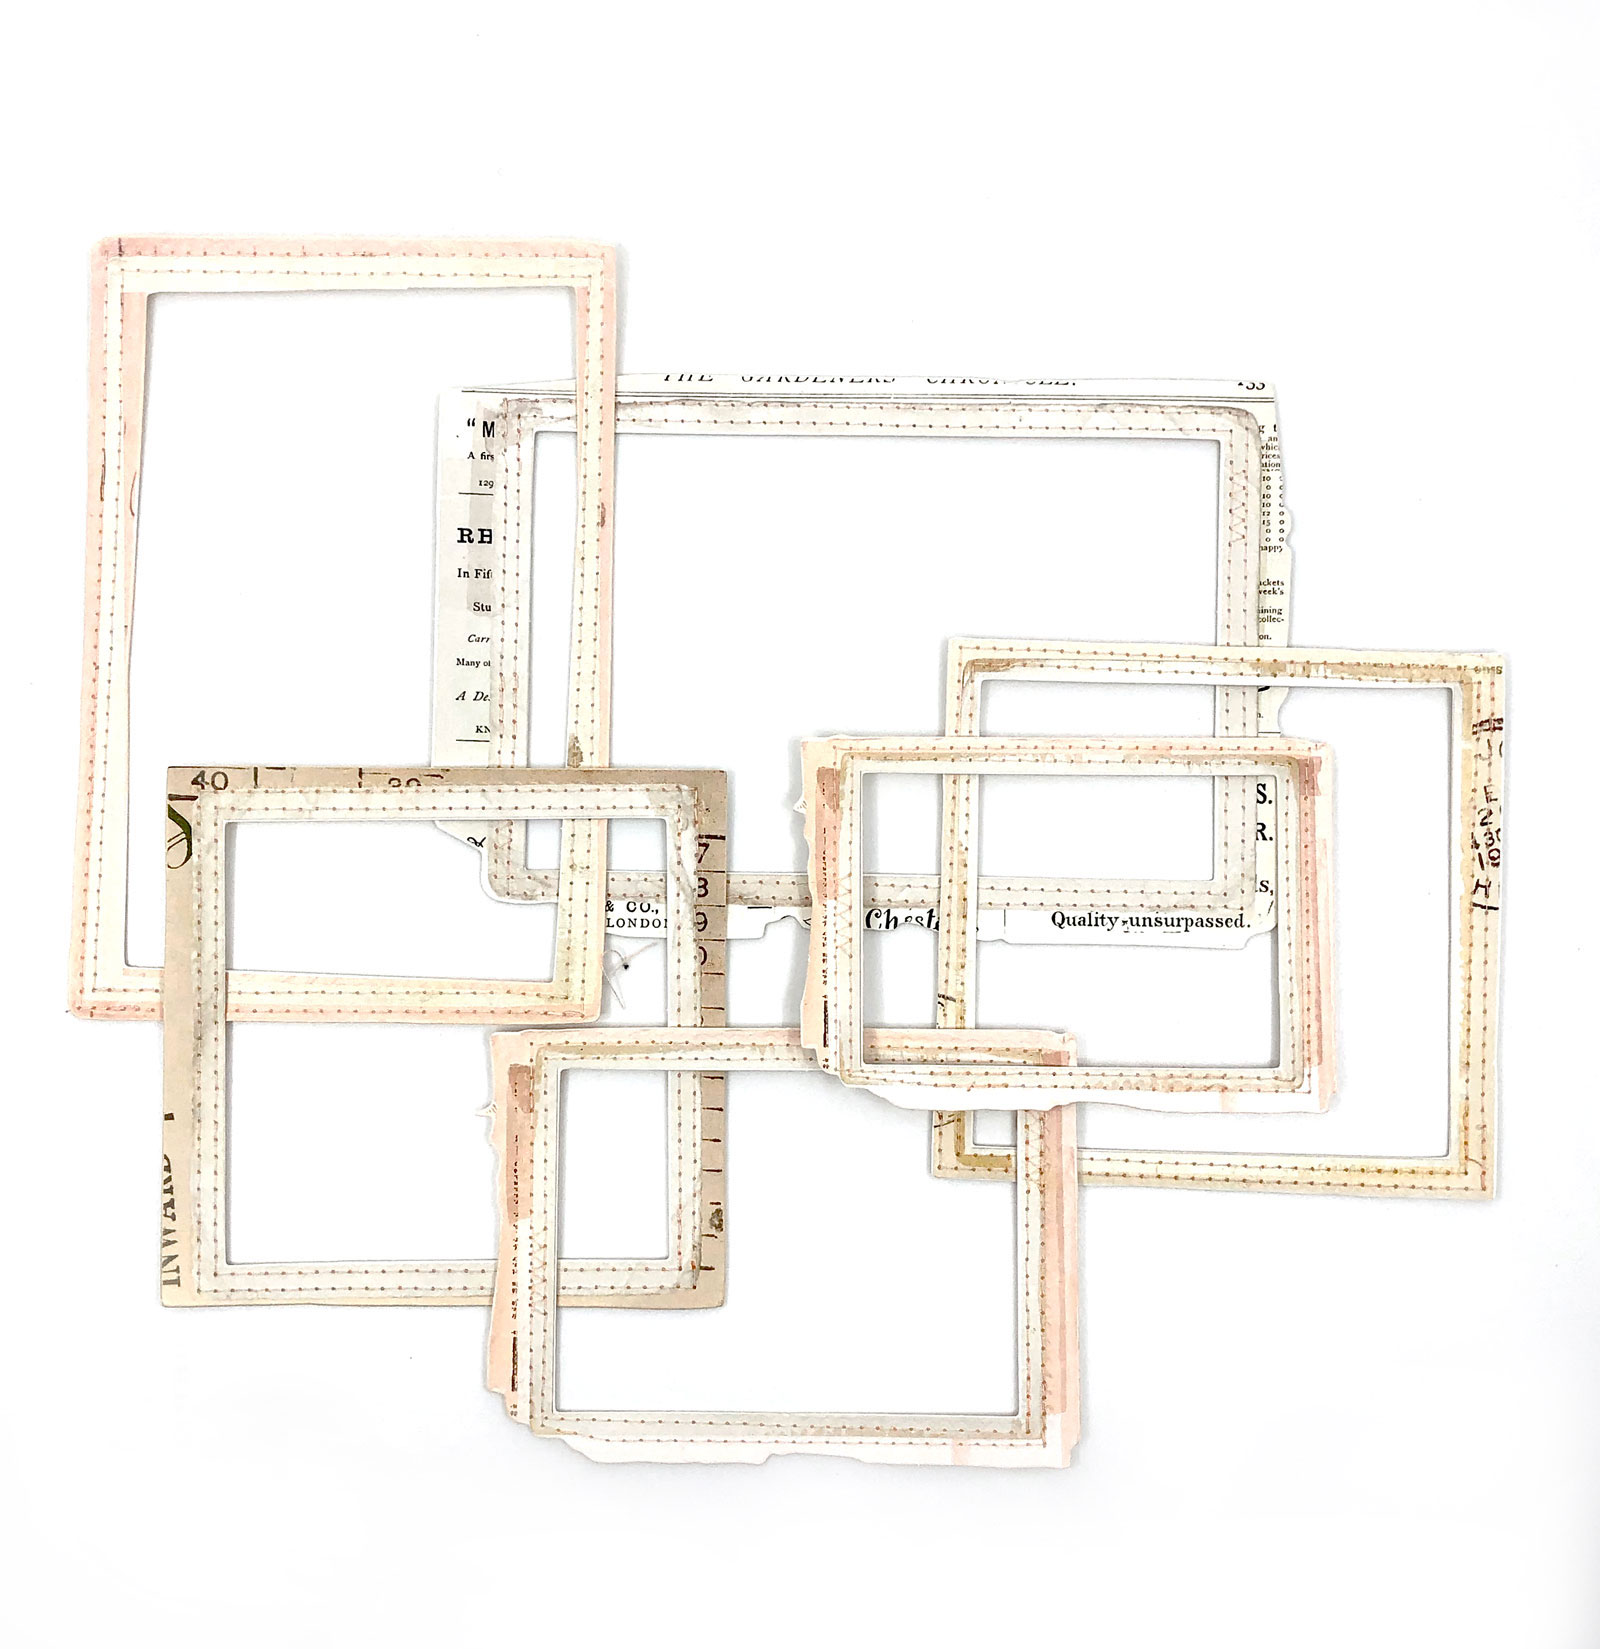
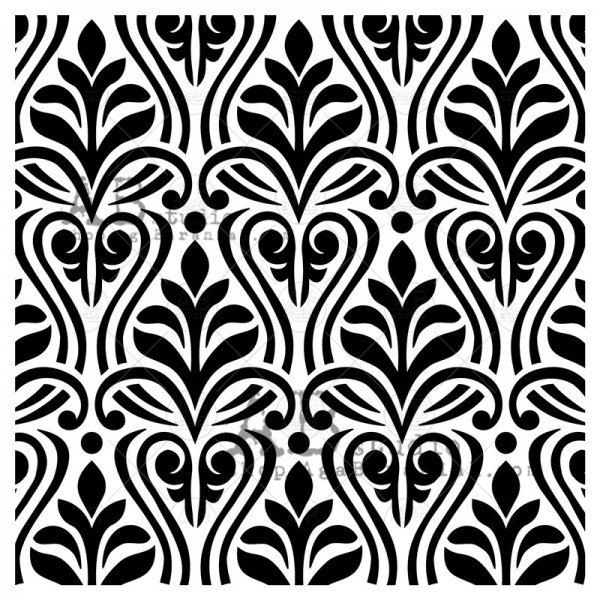
J'ai ajouté un motif avec le pochoir n°94 et de la pât à craqueler argent. Une fois sec, j'ai tamponné avec le tampon n°208 autour du motif. 

I added a design with the stencil ID-94 and silver crackle paste around the opening. When dry, I stamped around the design with the stamp ID-208.


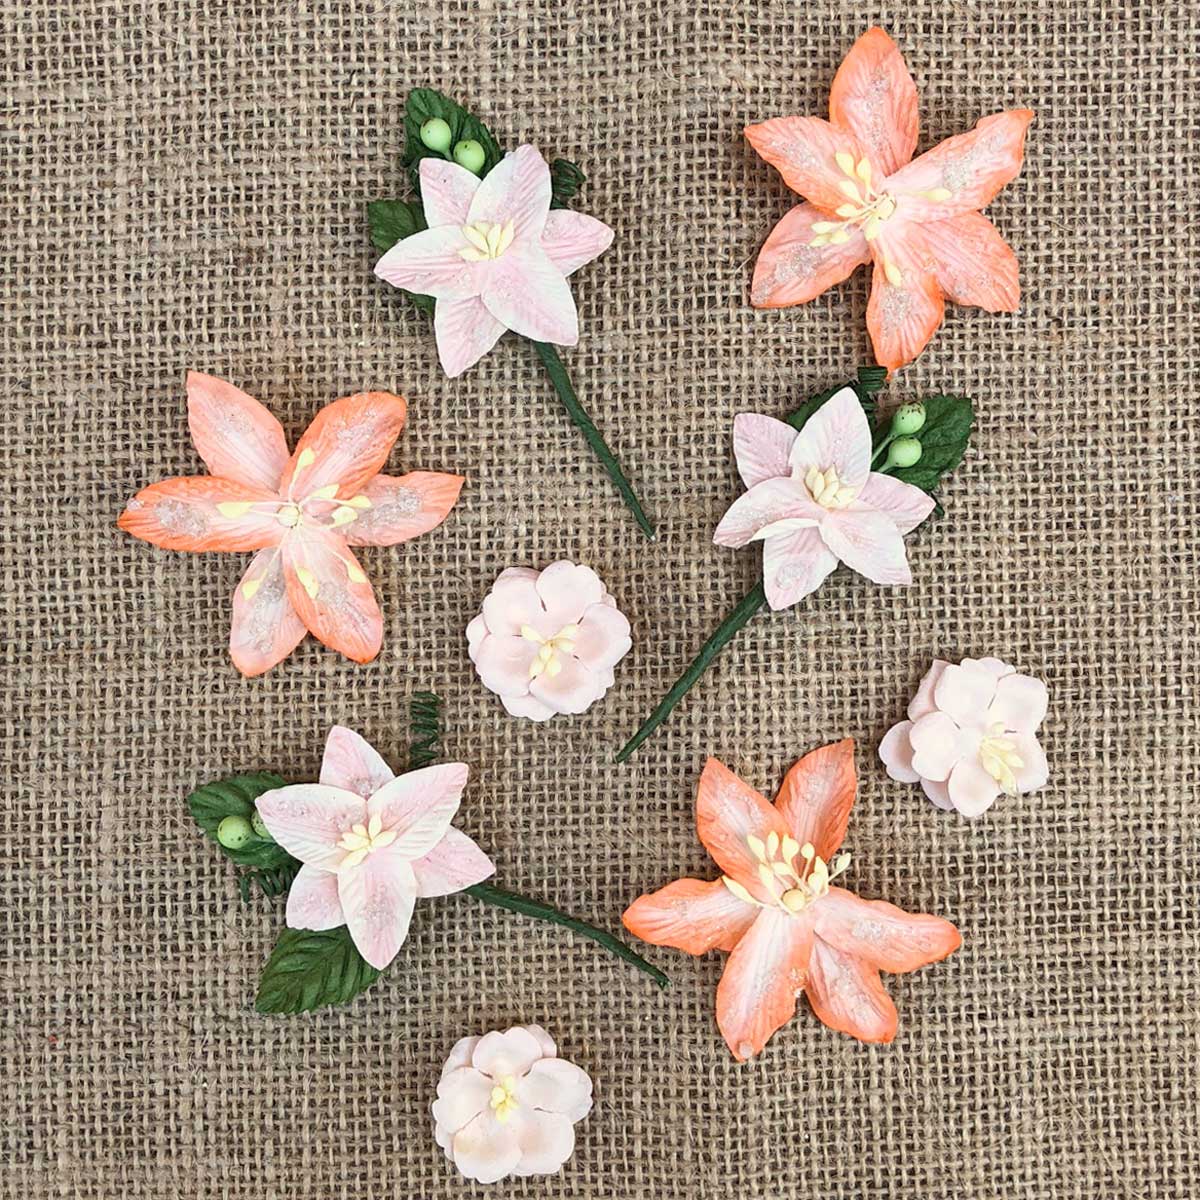
J'ai commencé ma composition avec de la dentelle, puis divers éléments métaliques: principalement des fleurs, mais pas seulemnt. J'ai ajouté des ailes, des capsules, des feuilles, des perles ... et également des fleurs en papier.

Next, I started to build my composition with lace first, then different metallic elements: mostly flowers, but not only. I added wings, bottle caps, leaves, pearls, ... and paper flowers as well. 


J'ai rempli les espaces vides avec des Art Stones colorées avec un liquide effet mirroir

I filled the empty spots with Art Stones colored with a mirror effect liquid.


Une fois satisfaite de la composition, j'ai ajouté de la coueurs avec de Magical Glitzy et de l'acrylique liquide Carmin pour donner une touche de rouille. 

When happy with the composition, I added some color around the composition with Glitzy Magical and Carmin liquid acrylic to add a touch of rust. 


Pour finir la mise en page, j'ai ajouter des glitters or, argent et noir qui rapellent les couleurs du fond. 

To finish the layout, I added glitters in gold, silver, and black that remind the colors of the background. 

Matériels / Materials:

A.B. Studio products:

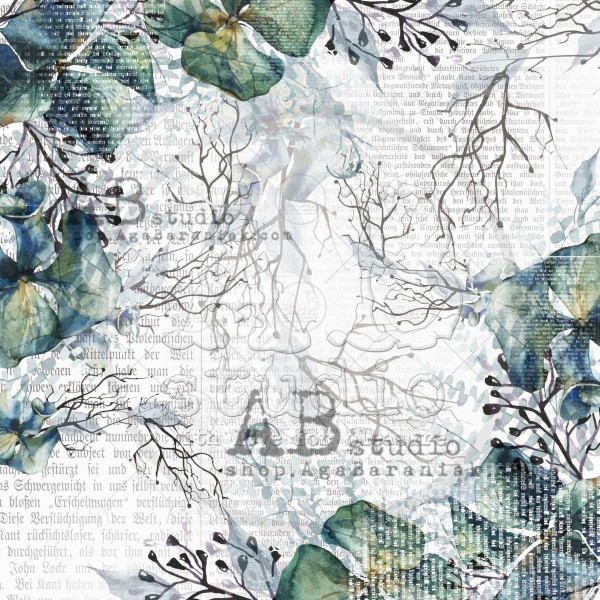
In the Past
Feeling of home


In the Past
Something Magical

Stencil ID-94


Stamp ID-208

Other products:
  • Spray inks - Lindy's Gang (Opal Sea Oats);
  • Glitzy Magical (Glitzy Gold, Snazzy Sparkle);
  • Mechanical  - Finnabair Prima (Woodland Leaves, Flowers, Flowers Mini, Wings);
  • Art Alchemy - Finnabair Prima (Liquid Acrylic: Carmin);
  • Art Ingredients - Finnabair Prima (Art Stones);
  • Art Extravagance - Finnabair Prima (Silver Crackle Paste);
  • Art Basics - Finnabair Prima (Clear Gesso, 3D Matte Gel, Soft Gloss Gel).

jeudi 24 septembre 2020

Trust Your Heart - Mixed media layout for 49 and Market

Bonjour à toutes,

Aujourd'hui, j'ai un nouveau tutoiel video à partager avec vous. J'ai rélisé une page hivernale avec la collection Vintage Artistry Coral.

Hello Sweeties,

Today I have a new video tutorial to share with you. I make a wintery layout with the Vintage Artistry Coral. 


Processus / Basic process: 
  1. Tamponner ici et là avec les set de tampons Always Together, In Between et Captured Adventures 2 ;
    Stamp randomly with Always Together, In Between, and Captured Adventures set 2;


  2. Protéger le fond avec du gesso transparent ; 
    Protect the background with clear gesso;
  3. Ajouter un motif avec un pochoir Gothic et de la pâte à craqueler argent ;
    Add a design with a stencil Gothic and Silver crackle paste;


  4. Découper des flocons dans du papier aquarelle et les embosser avec la poudre Magic Moon Pearl;
    Die-cut some snowflakes in a watercolor paper and emboss them with Magic Moon Pearl EP;
  5. Découper également quelques baies et branches dans du papier épais noir, les colorer avc Gag Me With a Spoon, et les embosser avec la poudre Clearly Clear ;
    Die-cut some berries and branches in a black cardstock, color them with Gag Me With a Spoon, and emboss them with Clearly Clear EP;


  6. Coller tous les embellissements avec du gel 3D Matte ;
    Glue everything with 3D Matte Gel;


  7. Ajouter des sequins et des glitters ;
    Add sequins and glitters;
  8. Ajouter une touche finale avec des Wishing Bubbles.
    Add a final touch with a few Wishing Bubbles.


J'espère que vous apprécierez cette vidéo / I hope you will enjoy the video!


Matériels / Materials:

49 and Market products:


Vintage Artistry Coral
Je t'aime

Vintage Artistry Coral
Stiched Frames

Stargazers
Peach Sorbet

Maura's Vineyard
Rosé

Always Together
Stamp Set

In Between
Stamp Set

Captured Adventures
Stamp Set 2

Wishing Bubbles
Taffy

Other products:
  • Starburst - Lindy's Gang (Gag Me With A Spoon);
  • Embossing Powders - Lindy's Gang (Clearly Clear, Magic Moon Pearl);
  • Stencil - Finnabair Prima (Gothic);
  • Glitter - BFS (Garnet);
  • Art Ingredients - Finnabair Prima (Glitter: Luminous Set);
  • Art Extravagance - Finnabair Prima (Silver Crackle Paste);
  • Art Basics - Finnabair Prima (Clear Gesso, 3D Matte Gel, Soft Gloss Gel).

jeudi 17 septembre 2020

Art is the Answer - Mixed media panel for Lindy's Gang DT

Bonjour à toutes,

Aujourd'hui je suis sur le blog de Lindy's Gang avec un panneau mixed media. Le fils de mon amie aime démonter des machines comme les ordinateurs, ... et j'ai été trés heureuse quand il m'a fait cadeau d'un de ses trésors : une carte mère ...

Hello Sweeties

Today I'm up on Lindy's Gang blog with a mixed media panel. The 10 years old son of my friend likes to take apart machines like computers ... and I was very happy when he gives one of his treasures: a motherboard ... 


  1. Coller un morceau de Papier de soie avec du gel medium mat et la carte mère avec du gel très épais ;
    Glue a piece of collage paper with Soft Matte Gel and the motherboard with Heavy Body Gel;
  2. Recouvrir la carte mère de gesso noir ;
    Prime the motherboard with Black Gesso;
  3. et le papier de soie de gesso transparent ;
    And the collage paper with Clear Gesso;

  4. Construire votre composition à la limite etre la carte mère et le papier de soie ;
    Built your composition on the limit between the motherboard and the collage paper;
  5. Ajouter des Art Stones pour remplir les espaces vides si besoin ;
    Add some Art Stones to fill the empty spaces if needed;

  6. Recouvrir les embellissements qui se trouvent sur la carte mère de gesso noir ;
    Cover the embellishments on top of the motherboard with Black Gesso;
  7. Et les autres de gesso blanc ;
    and the others with White Gesso;
  8. Vaporiser avec les encres Red Hot Poker Orange, Cattail Copper Brown et Silent Night Silver ;
    Spray with Red Hot Poker Orange, Cattail Copper Brown, and Silent Night Silver;
  9. Ajouter une couche de gesso blanc pour couvrir les embelleissements et a carte mère : les couleurs des encres seront toujours visible avec le gesso ; 
    Add a layer of White Gesso to cover the embellishments and the motherboard: the colors of the inks will show through the Gesso;

  10. Ajouter un peu de poudres Snazzy Sparkle et Scintillating Silver sur les embellissements ;
    Add some Snazzy Sparkle and Scintillating Silver on top of the embellishments;
  11. Ajouter également de l'encre Tainted Love Teal ;
    Add Tainted Love Teal ink as well;

  12. Mettre en évidence les détails avec des cires : Rich Copper, Brushed Iron et White Gold ;
    Highlight the details with waxes: Rich Copper, Brushed Iron and White Gold;
  13. Pour finir ajouter des glitters noirs.
    To finish, add some black glitter.
J'espère que vous aimerez cette vidéo / I hope you will enjoy this video:


Matériels / Materials:

Lindy's Gang products:
Other products:
  • Collage Paper - Idea-Ology (Typeset)
  • Mechanicals - Finnabair Prima (Antique Label, Flowers, Steampunk Gears, Steampunk Blades, Mini Hardware, Mechanical Roses, Flowers Mini, Mini Knobs);
  • Art Ingredients - Finnabair Prima (Art Stones);
  • Art Basics - Finnabair Prima (Heavy Black Gesso, Heavy White Gesso, Clar Gesso, Soft Matte Gel, Heavy Body Gel).

jeudi 10 septembre 2020

Fearless - Mixed media layout for AB Studio DT

Bonjour à toutes,

Aujourd'hui c'est un nouveau tutoriel pour A.B. Studio  que je vous propose. Pour réaliser cette page, j'ai utilisé la collection The Versailles. 

Hello Sweeties,

Today I have a new step-by-step video for A.B. Studio to share with you. To create this layout, I worked with the beautiful collection The Versaille. 


Processus / Basic process:
  1. Tamponer ici et là avec le tampon n°208 et de l'encre Archival noire ;
    Stamp randomly with the stamp ID-208 with black Archival ink;
  2. Recouvrir le papier de fond de gesso transparent ;
    Prime the background with clear gesso;
  3. Ajouter un motif avec le pochoir n°64 et de la pâte à texture ;
    Add a design with the stencil ID-64 and modeling paste;


  4. Peindre les deux morceaux du Carboard n°157 avec la Sparks Unicorn's Hair ;
    Paint the two pieces of the cardboard ID-157 with Unicorn's Hair Sparks;
  5. Recouvrir les éléments en résine avec du gesso transparent ;
    Prime the resin elements with clear gesso;
  6. Colorer les éléments en résine avec Screaming Banshee Black, Afternoon Delight Denim et Cathedral Pines Olive. Une fois sec, faire ressortir les détails avec les cires Vintage Silk and Firebird ;
    Color the resin elements with Screaming Banshee Black, Afternoon Delight Denim, and Cathedral Pines Olive. When dry, highlight the details with the waxes Vintage Silk and Firebird;


  7. Ajouter églement de la cire Firebird sur les élements en Cardboard ;
    Add a little bit of the Firebird wax to the cardboard elements;
  8. Découper des feuilles tropicales dans du papier aquarelle et colorer les colorer avec les encres Jack In The Pulpit Teal and Maple Syrup Bronze ;
    Die-cut some tropical leaves in a watercolor paper and color them with Jack In The Pulpit Teal and Maple Syrup Bronze inks;


  9. Découper quelques feuilles et les colorer avec Afternoon Delight Denim, Cathedral Pines Olive, et Maple Syrup Bronze. Faire ressortir les détails avec la cire Firebird ;
    Die-cut a few leaves and color them with Afternoon Delight Denim, Cathedral Pines Olive, and Maple Syrup Bronze. Highlight the details with the Firebird wax;
  10. Colorer le motif du fond avec les mêmes couleurs ;
    Color the design from the background with the same colors;


  11. Ajouter le même motif sur la maison transparente avec la Sparks Unicorn's Hair ;
    Add the same design to the house transparent element with Unicorn's Hair Sparks;
  12. Commencer votre composition en ajouter des éléments sur et sous l'élément transparente pour ajouter plus de dimension à votre projet et coller le tout avec du gel 3D mat.
    Built your composition under and on top f the transparent element to add more dimension to your project and glue everything with 3D Matte Gel;
  13. Pour finir, ajouter des sequins, des microbilles et des glitters.
    To finish, add sequins, microbeads, and glitter.


J'ai enregistré la réalisation de cette page. J'espère que vous apprécirez cette vidéo.

I recorded the process while I was making this layout. So I hope you will like it!


Matériels / Materials
49 and Market products:

The Versailles
Visiting Versailles

Cardboard ID-157


Transparent Elements ID-7


Stencil ID-64

Stamp ID-208

Other products:
  • Flowers - 49 and Market (Sugar Posies: Butterscotch; Maura's Vineyard: Butterscotch);
  • Magical Shakers - Lindy's Gang (Afternoon Delight Denim, Cathedral Pines Olive);
  • Magical - Lindy's Gang (Screaming Banshee Black);
  • Starburst - Lindy's Gang (Jack In The Pulpit Teal);
  • Squirt - Lindy's Gang (Maple Syrup Bronze);
  • Die - Craft Emotions (Tropical Leafs);
  • Moulds - Re-Design Prima (Baroque Swirl, Keyholes);
  • Art Alchemy - Finnabair Prima (Sparks: Unicorn Hair; Waxes: Vintage Silk, Firebird);
  • Art Ingredients - Finnabair Prima (Glitter: Luminous Set; Microbeads: Copper);
  • Art Basics - Finnabair Prima (Clear Gesso, Modeling Paste, Soft Gloss Gel, 3D Matte Gel).

samedi 5 septembre 2020

Japanese Girl - Mixed media layout for Lindy's Gang DT

Bonjour à toutes,

Aujourd'hui je suis sur le blog de Lindy's Gang avec un nouveau tutoriel où vous pourrez découvrir commet réaliser cette pge. 

Hello Sweeties,

Today I'm up on Lindy's Gang blog with a new video tutorial where you will discover how to make this layout.


Processus / Basic process:
  1. Tamponner avec une encre Archival noire ici et là ;
  2. Stamp with a black Archival ink randomly;
  3. Protéger le fond d'une couche de gesso transparent ;
    Prime the background with clear gesso;


  4. Ajouter un motif à l'aie d'un pochoir et de pâte à craqueler transparente, laisser sécher naturellement pour permmettre aux craquelures d'apparaître ;
    Add a design with a stencil and clear crackle paste, leave to dry naturally to allow the crackles to appear;
    Pendant ce temps / In the meantime:
  5. Découper quelques feuilles et branches dans du papier aquarelle :
    Die-cut some leaves and branches in a watercolor paper;
  6. Colorer les branches de pin avec Stormy Sky, Evergreen Emerald et Snazzy Sparkle ;
    Color the pine branches with Stormy Sky, Evergreen Emerald, and Snazzy Sparkle;


  7. Colorer quelques fleurs avec Château Rose et Jazzy Jivin' Purple ;
    Color some flowers with Chateau Rose and Jazzy Jivin' Purple;
  8. Colorer les feuilles avec Stormy Sky mélangé avec Snazzy Sparkle, Evergreen Emerald également mélangé avec Snazzy Sparle et Jazzy Jivin' Purple ;
    Color the leaves with Stormy Sky mixed with Snazzy Sparkle, Evergreen Emerald mixed with Snazzy Sparkle too, and Jazzy Jivin' Purple;


  9. Colorer également le motif avec Stormy Sky Evergreen Emerald et Jazzy Jivin' Purple ;
    Color the design with Stormy Sky, Evergreen Emerald and Jazzy Jivin' Purple too;
  10. Coller tous les éléments avec du gel 3D mat ;
    Glued all the elements with 3D Matte Gel;
  11. Ajouter de cire or blanc aux feuilles ;
    Add some white gold wax to the leaves;


  12. Ajouter des glitters (turquoise et violet) ;
    Add some glitters (teal and purple);
  13. Découper quelques baies dans du papier aquarelle et colorer les avec Jazzy Jivin' Purple et Scintillating Silver ;
    Die-cut some berries in a watercolor paper and color them with Jazzy Jivin' Purple and Scintillating Silver;
  14. Finalement ajouter quelques pierres embossées une fois ou deux avec la poudre Hollyhock Scarlet Plum ;
    Finally, add some pebbles embossed once or twice with Hollyhock Scarlet Plum EP.


J'espère que vous apprécierez cette vidéo / I hope you will enjoy the video:


Matériels / Materials:

Lindy's Gang products:
Other products:
  • Flowers - WOC (Lotus, Mini Lilies);
  • Stencil - A.B. Studio (Stencil ID-29);
  • Die - Dees Distinctively (Pine Branches);
  • Die - Mimi Cut (Herborium);
  • Art Ingredients - Finnabair Prima (Peebles; Glitter Luminous Set);
  • Art Alchemy - Finnabair Prima (Wax: White Gold);
  • Art Extravagance - Finnabair Prima (Clear Crackle Paste);
  • Art Basics - Finnabair Prima (Clear Gesso, 3D Matte Gel, Soft Gloss Gel).
Related Posts Plugin for WordPress, Blogger...