Affichage des articles dont le libellé est Lindy's Stamp Gang. Afficher tous les articles

mardi 4 février 2020

Seahorse - Nomadic Soul Diaries DT

Bonjour à toutes,

Aujourd'hui c'est un project pour Nomadic Soul Diaries que je vous propose : un tag mixed media.

Hello Sweeties,

Today I have a project for Nomadic Soul Diaries to share with you: a mixed media tag.


To participate you need to post your project on Instagram. 

RULES:
  • Create a NEW project for the challenge.
    • Your project must be a TAG or an ALTERED OBJECT.
    • Use only the colors of the COLOR PALETTE (at least 3 of them). You can also use white, black, gold, silver, copper.
    • Add the MANDATORY ELEMENT to your project: SEA ELEMENTS.
    • Add the inspiration QUOTE in your project or get inspired by it (and tell us how).
  • Follow February Wandering Stars: click on the poster to see their @.
  • Follow the creative souls: @addi.mahajan @nuneka__.
  • Follow our sponsors: check February Sponsors post.
  • Use the hashtag #NSDjan20 to submit your entree and tag us @nomadicsouldiaries.
You have until February 27th. Winners will be announced on February 29th.

Processus / Basic process:
  1. Colorer un papier aquarelle avec Jana's Jade, Opal Sea Oats and Treasure Aqua ;
    Color a watercolor paper with Jana's Jade, Opal Seat Oats and Treasure Island Aqua;
  2. Mélanger du gel 3D brillant, des glitters or et un peu de Jana's Jade pour faire une pâte maison ;
    Mix 3D Gloss gel, gold glitter, and a little bit of Jana's Jade powder to make your own paste;
  3. Utiliser cette pâte pour ajouter un motif à l'aide de deux pochoirs cercle ;
    Use this paste to add a design with two circle stencils;
  4. Colorer des hippocampes en résine avec Treasure Island Aqua, Jana's Jade, Azure Sea Aster et Opal Sea Oats ;
    Color some resin seahorses with Treasure Island Aqua, Jana's Jade, Azure Sea Aster, and Opal Sea Oats;


  5. Colorer les filets avec Treasure Island Aqua ;
    Color the fishing nets with Treasure Island Aqua;
  6. Embosser les coquillages avec Don't Scream Aquamarine et les étoiles avec TinRoof, Rusted!
    Emboss the seashells with Don't Scream Aquamarine and the starfish with Tin Roof, Rusted! EP;

  7. Embosser les filets avec King Midas Gold ;
    Emboss the fishnets with King Midas Gold;
  8. Matifier les embellishments avec du gesso transparent ;
    Mattify the layered embellishment with clear gesso;
  9. Colorer un ruban avec les mêmes encres ;
    Color a ribbon with the same inks;
  10. Coller le fond sur un tag ;
    Glue the background to a cardboard tag;
  11. Ajouter des tâches avec Azure Sea Aster et tamponner avec de l'encre noire ;
    Add some splatters of Azure Sea Aster and stamp with black ink;
  12. Coller tous les embellissement, ajouter du lichen et des coquillages ;
    Glue all the embellishments, add some natural lichen and seashell;
  13. Pour finir la composition, ajouter des microbilles et des glitters.
    To finish the composition, add microbeads and glitters.
Quelques gros plans / Some close-ups:


Et voici la vidéo / And here is the step-by-step video:


Matériels / Materials:
  • Moon Shadow Mist - Lindy's Gang (Treasure Island Aqua);
  • Magical  - Lindy's Gang (Jana's Jade (Alexandra's Artists), Opal Sea Oats);
  • Chunky Embossing Powders - Lindy's Gang (Tin Roof, Rusted!; Don't Scream Aquamarine);
  • Stencil - A.B. Studio (Stencil ID-15, Stencil ID-79);
  • Stamp - A.B. Studio (STamp ID-208);
  • 3D layered embellishment - 49 and Market (Underwater);
  • Chipboard - 49 and Market (Escape);
  • Art Ingredients - Finnabair Prima (Microbead: Splash; Glitter: Luminous set);
  • Art Basics - Finnabair Prima (Clear Gesso, 3D Gloss Gel, 3D Matte Gel, Soft Matte Gel).


mercredi 29 janvier 2020

Dwell in Possibility - A.B. Studio DT

Bonjour à toutes,

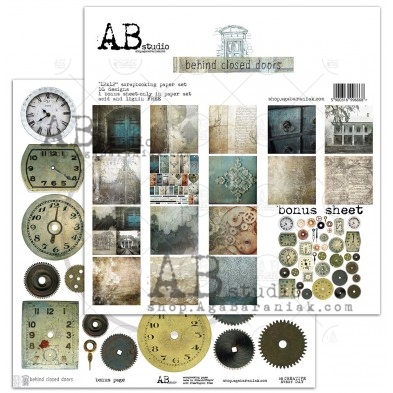
Aujourd'hui j'ai un projet pour A.B. Studio que je vous propose réalisée avec la collection Behind Closed Doors.

Hello Sweeties,

Today I have a project for A.B. Studio to share with you featuring the Behind Closed Doors. 


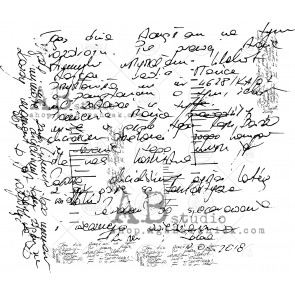
J'ai tamponné le fond avec le tampon texte n°208. Puis, j'ai protégé le fond d'une couche de gesso transparent. Enfin, j'ai ajouté un peu de couleur au fond avec diverses squiurts : Canadian Bacon Blush, Beaver Tail Brown, et Hockey Puck Black.

I stamped randomly with the stamp text ID-208. Next, I primed the background with clear gesso. When dry, I added some color with different squirts from Lindy's Gang: Canadian Bacon Blush, Beaver Tail Brown, and Hockey Puck black. 


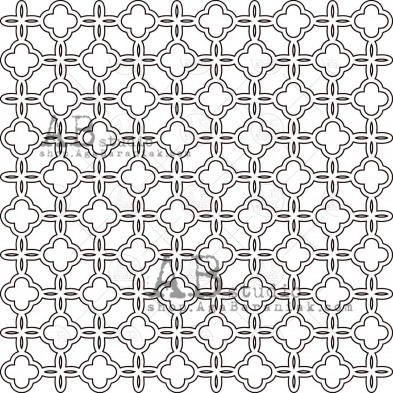
Ensuite j'ai ajouté un motif avec le pochoir n°71 et de la pâte à craqueler transparente.

Next, I added a design with the stencil ID-71 and clear crackle paste. 


J'ai découpé quelques feuillages dans du papier aquarelle. Je les ai coloré avec les squirts utilisées précédemment et une encre verte. J'ai ajouté une petite touche de Canadian Bacon Blush aux fleurs.

I die cut some leaves in a watercolor paper. I colored them with the Squirts used previously and a green ink. I added a little touch of Canadian Bacon Blush to the flowers.


J'ai coloré une montre en résine blanche, recouvert de gesso transparent, avec Hockey Puck Black. Je l'ai ciré ainsi que quelques éléments en résine transparente avec les cires Old Silver et White Gold.

I colored a white resin clock, primed with clear gesso, with Hockey Puck Black. I  waxed it as well as a few clear resin elements with Old Silver and White Gold waxes. 


Une fois que tout est prêt, j'ai collé les embellissements avec du gel 3D mat.

When everything was ready, I glued all the embellishments with 3D Matte Gel. 


Pour terminer la mise en page, j'ai ajouté des glass glitters, des micorbilles et des mini-étoiles.

To finish the layout, I added some glass glitters, microbeads, and mini-stars. 

Matériels / Materials:

A.B. Studio products:


Behind Closed Doors
Bonus Sheet

Behind Closed Doors
Future Memories

Stencil ID-71

Rubber Stamp ID-208
Stamp ID-208


Other products:
  • Squirts - Lindy's Gang (Canadian Bacon Blush, Beaver Tail Brown, Hockey Puck Black);
  • Starburst - Lindy's Gang (Green With Envy Green);
  • Flowers - 49 and Market (Enchanted Flowers: Ballet Slipper; Mini Serie 01: Mushroom);
  • Moulds - Prima (Baroque #6, Seashore Treasures, Etruscan);
  • Art Alchemy - Finnabair Prima (Waxes: Old Silver, White Gold); 
  • Art Ingredients - Finnabair Prima (Glass Glitter: STerling)
  • Art Extravagance - Finnabair Prima (Clear Crackle Paste);
  • Art Basics - Finnabair Prima (Clear Gesso, 3D Matte Gel, Soft Matte Gel).

vendredi 24 janvier 2020

Snapshot - 49 and Market DT

Bonjour à toutes,

Aujourd'hui je suis sur le blog de 49 and Market avec une nouvelle vidéo pour réalisée cette page réalisaée avec la nouvelle collection Natural Vintage Artistry

Hello Sweeties,

Today I'm up on 49 and Market blog with a step-by-step video: a layout featuring the Natural Vintage Artistry mini-collection. 

Photo by JJ Jordan on Unsplash

Processus / Basic process:
  1. Tamponner la feuille Gilded avec le set Snapshots of Yesterday avec des encres marrons et noires ;
    Stamp the Gilded paper with Snapshots of Yesterday set with brown and black inks;
  2. Protéger le fond d'une couche de gesso transparent ;
    Prime the background with clear gesso;
  3. Couper quelques papiers du paquet Natural Collage Stacks en bandes ;
    Cut a few papers from the Natural Collage Stacks into strips;
  4. Coller les bandes de papiers et de washi tape sur le fond ;
    Glue the paper strips and washi strips to the background ; 
  5. Recouvrer les d'une couche de gesso transparent ;
    Prime them with clear gesso too;
  6. Retamponner ;
    Add more stamping;
  7. Ajouter un motif à l'aide d'un pochoir et de pâte à craqueler ;
    Add a design with white crackle paste and a stencil;


  8. Découper quelques feuilles, branches et baies dans du papier aquarelle ;
    Die-cut some leaves, sprigs, and berries in a watercolor paper;
  9. Colorer les avec diverses encres ;
    Color them with different inks;
  10. Utiliser les mêmes encres pour ajouter un peu de couleur sur le motif ;
    Use the same inks to add some colors to the design;
  11. Coller tous les embellissements avec du gel 3D mat ;
    Glue all the embellishments with 3D Matte Gel;


  12. Pour finir la mise en page ajouter des microbilles et des mini-étoiles.
    To finish the layout add some microbeads and mini-stars.

Quelques gros plans / Some close-ups:


Et voici la vidéo / And here is the video:


Matériels / Materials:

49 and Market products:

Vintage Artistry Natural
Gilded
Natural
Collage Stacks
Natural
Washi Strips
Snapshots of Yesterday
Stamp Set

Pascale's Equations
Stamp

Garden Petals
Sunshine

Other products:
  • Squirts - Lindy's Gang (Maple Syrup Bronze, Beaver Tail Brown, Hockey Puck Black);
  • Starburst - Lindy's Gang (My Mojito Green);
  • Stencil - A.B. Studio (Stencil ID-70);
  • Die - Sizzix (Skeleton Leaves);
  • Die - Mimi Cut (Herbarium 3);
  • Art Ingredients - Finnabair Prima (Microbead Set);
  • Art Extravagance - Finnabair Prima (White Crackle Paste);
  • Art Basics - Finnabair Prima (Clear Gesso, Soft Matte Gel, 3D Matte Gel).

vendredi 26 janvier 2018

Le Mont Saint Michel - Maja Design DT

Bonjour à toutes,

Aujourd'hui je suis sur le blog de Maja Design avec une nouvelle page réalisée avec la collection Joyous Winterdays. J'ai choisi un photomontage que j'ai réalisée, inspiré du Château des Pyrénes de René Magritte. Oh ! j'oubliais de vous dire qu'il y a une vidéo pour voir comment j'ai réalisée cette page et n'oubliez pas que vous pouvez gagner la nouvelle collection ici.

Hello Sweeties

Today I'm up on Maja Design blog with a new layout featuring the Joyous Winterdays collection. I chose to work with a photomontage I've made, inspired by The Castle of The Pyrénée by René Magritte. Oh, I forget to tell you that there is a step-by-step video showing you how I make this layout and don't forget that you still can win the new collection there.


J'ai tamponné ici et là le fond avec une encre Archival noire et deux de mes tampons  : Pasale's Form et Pascale's Grammar . Puis j'ai recouvert le fond de gesso transparent.

I stamped randomly the background with two of my stamps Pascale's Form and Pascale's Grammar with a black Archival ink. Next, I primed the background with clear gesso.


Une fois sec, j'ai utillisé plusieurs tampons pour ajouter de la couleur au fond avec plusieurs encres. J'ai terminé avec des taâches faites avec ces mêmes encres. Une fois contente du résultat, j'ai ajouté un motif à l'aide d'un pochoir et de pâte à craqueler blanche.

When dry, I used different stamps to add some color to the background with different inks. I finished with splatters of the same inks. When happy with the result, I added a design with a stencil and white crackle paste.


Pendant que la pâte à craqueler séchait, j'ai coloré le chipboard avec des Magicals. Je les ai ensuite saupoudré avec une poudre à embosser pour donner un peu de texture.

While the paste was drying, I colored the Archival board with Magicals. Next, I sprinkled them with an embossing powder to add some interest.


J'ai coloré les fleurs avec deux encres: une pêche, l'autre vieux rose.

I colored the flowers with two inks: one peach, one vintage rose. 


J'ai coupé quelques papiers pour ajouter sous la photo et j'ai collée les embellissements avec un gel 3D. POur terminer la mise en page j'ai ajouté des Art Stone et des microbilles.

I cut a few papers to add under the photo and I glue all the embellishments with a 3D gel. To finish the layout I added some Art Stone and microbeads.


Et voici la video / And here is the video link:


Matériels / Materials:

Maja Design products:


Ephemera bs
Ephemera bs
Sparkle
Sparkle
Blizzard bs
Blizzard bs
949-Paper-pack-Joyous-Winterdays-w
6x6 pad

Other products:
  • Flowers - 49 and Market (Garden Blooms: Alabaster; Garden Vine: Alabaster);
  • Archival Board - 49 and Market (Timeless White);
  • Stams - 49 and Market (Pascale's Grammar, Pascale's Grammar, Gabi's Herbaceous, Gabi's Sunshine);
  • Starburst - Lindy's Stamp Gang (Whale Watch Blue, Creme Brulee Cream, Fuzzy Navel Peach, Bodacious Blush);
  • Moon Shadow - Lindy's Stamp Gang (Long John's Silver);
  • Magical - Lindy's Stamp Gang (Industrial Chic Set);
  • Stencil - Finnabair Prima (Stars);
  • Art Ingredients - Finnabair products (Microbeads: );
  • Art Extravagance - Finnabair products (White Crackle Paste, Art Stone);
  • Art Basic - Finnabair products (Clear Gesso, 3D Gloss Gel, Soft Matte Gel).

Did you know Maja Design is on Social Media?

Pinterest: Did you know that Maja Design has a Pinterest Page? You can find it right here.
Facebook: You can follow us on Facebook right here and of course "LIKE" us.
Instagram: Maja also has an Instagram account – majadesigninsweden.
(Use the hashtag #majadesigninsweden or the tag @majadesigninsweden
with your Maja papers so we can find you.)
YouTubehttps://www.youtube.com/user/MajaDesignChannel

jeudi 21 décembre 2017

Happy Moments - Maja Design DT

 Bonjour à toutes,

Aujourd'hui je suis sur le blog de Maja Design avec une page réalisée avec la collection Joyous Winterdays. Le temps est un peu fou en ce moment, froid, venteux, ... Alors j'ai pensé que peut-être un chocolat chaud serait le bienvenu, quand pensez-vous ?

Hello Sweeties

Today I'm up on Maja Design blog with a layout featuring the Joyous Winterdays collection. The weather is a little bit crazy nowadays, cold, windy, ... So I was thinking that perhaps a hot chocolate will be a great idea, what do you think?


J'ai commencé par ajouter quelques tampons ici et là. Ensuite, j'ai protégé le fond avec du gesso transparent. Je trouve que les tampons sont plus nets de cette façon.

I began to add some random stamping. Next, I primed the background with clear gesso. I find that the stamp images are crispier that way. 


Puis, j'ai ajouté un motif à l'aide d'un pochoir et de pâte à craqueler platine. J'aime beaucoup l'effet perle de cette pâte.

Next step, I added a design with a stencil and Platinum crackle paste. I love the pearl effect of this paste.    


Pendant que la pâte séchait, j'ai peint les chipboards avec differentes encres et Magicals. Une fois le titre sec, je l'ai embossé avec une poudre transparente.

While the crackle was drying, I painted the chipboards with different inks and Magical. When the title was dry I embossed it with a clear embossing powder.


J'ai ajouté un peu de couleurs au fond dans divers tons de bleu-gris.

I added some colors to the background with different shades of blue-gray. 


Puis, j'ai coupé quelques papiers pour ajouter sous la photo et j'ai collé tous les embellissements avec un gel 3D.

Next, I cut a few papers to add under the photo and glue all the embellishments with a 3D gel. 


POur terminer la mise en page, j'ai ajouté des glass glitters et des microbilles.

To finish the layout I added some glass glitter and microbeads. 

Matériels / Materials:

Maja Design products:


a
Glisten bs
Glisten bs
Snowball fight bs
Snowball Fight
Blizzard
Blizzard
949-Paper-pack-Joyous-Winterdays-w
6x6 pad

Other products:

  • Flowers - 49 and Market (Cottage Blooms - Poppy; Garden Seeds - Cotton, Poppy; Blossom Blend - Poppy);
  • Archival Board - 49 and Market (Happy Moments - White); 
  • Stamps - 49 and Market (Pascale's Form, Gabi's Herbaceous);
  • Starburst - Lindy's Stamp Gang (Whale Watch Blue);
  • Moon Shadow - Lindy's Stamp Gang (Incandescent Copper);
  • Magical - Lindy's Stamp Gang (Steel Shimmer);
  • Stencil - Finnabair Prima (Doily) ;
  • Art Ingredients - Finnabair Prima (Glass Glitter - Platinum, Microbead - Silver);
  • Art Extravagance - Finnabair Prima (Platinum Crackle Paste);
  • Art Basics - Finnabair Prima (Clear Gesso, 3D Gloss Gel, Soft Matte Gel).


Where can you purchase MajaDesign Papers?

MajaDesign collections are sold all around the world - 33 countries and growing with new stores being added often. Are you looking for a store location that sells Maja collections? Here is a helpful Store Finder link to help you shop. If your favorite store is not on this list, consider asking them to carry MajaDesign.

Related Posts Plugin for WordPress, Blogger...