mardi 28 août 2018

Art Journal Page - Lindy's Gang DT

Bonjour à toutes,

Aujourd'hui je suis sur le blog de  Lindy's Gang avec un nouveau pas-à-pas inspiré des pages du Art Journal de la talentueuse Anna Dąbrowska. Le jeune homme de la photo est mon oncle.

Hello Sweeties

Today I'm up on Lindy's Gang blog with a new step-by-step Art Journal page inspired by the talented Anna Dąbrowska. The young man in the photo is my uncle.


J'ai commencé par coller divers éléments avec du gel medium mat : une page de livre, du washi tape, du pansement, ...
Une fois satisfaite du résultat, j'ai recouvert l'ensemble d'une fine couche de gesso blanc.

First, I glued different elements with a soft matte gel: a book page, some washi tape, fabric tape, ...
When happy with the result, I covered everything with a thin layer of white gesso.


Ensuite, j'ai tamponné ici et là avec plusieurs ampons et de l'encre permanente noire. J'ai recouvert les les tampons avec du gesso dilué.
Ensuite, j'ai utilisé un brayer pour ajouter l'encre Long John's Silver.

Next, I added some random stamping with different stamps and a black Archival ink. I covered the stamp's images with watered gesso.
I used a brayer to add the Long John's Silver ink. 


Puis, j'ai ajoutéun motif à l'ai de d'un pochoir et de pâte à craqueler transparente que j'ai laissé sécher naturellement. Pendant ce temps, j'ai coupé quelques papiers pour mettre sous la photo.
La pâte séche, j'ai collé les papiers ainsi que du fil noir. J'ai recouvert les papiers de gesso transparent avant d'ajouter plus de couleur avec les encres Whale Watch Blue et C'est la vie Cerise.

Next, I added a design with a stencil and a clear crackle paste which I let dry naturally. In the meantime, I cut a few papers to add under the photo.
The paste dry, I glued the papers I've just cut as well as some black thread. I covered the papers with clear gesso. Next, I added more colors with Whale Watch Blue and C'est la vie Cerise inks.


J'ai rajouté quelques morceaux de Washi tapes qe j'ai recouvert de pâte à craqueler transparente.
Jai terminé la mise en page avec des tâches d'Enamel noir pour éviter que les tâches ne rentrent dans les craquelures.

I added more washi tape pieces that I covered which clear crackle paste. 
I finished the page with splatters of black enamel to prevent the splatters to go in the cracks. 


Quelques gros plans / Some close-ups:


Et voici la video / Here is the step-by-step video:


Matériels / Materials:

Lindy's Gang products:
Other products:
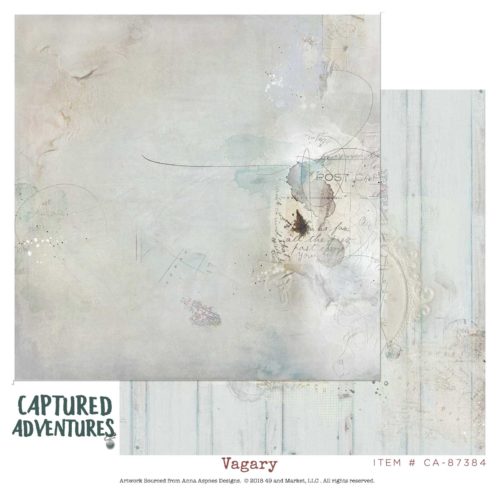
  • Papers - AB Studio (In Wonderland);
  • Stencil - AB Studio (Stencil #67);
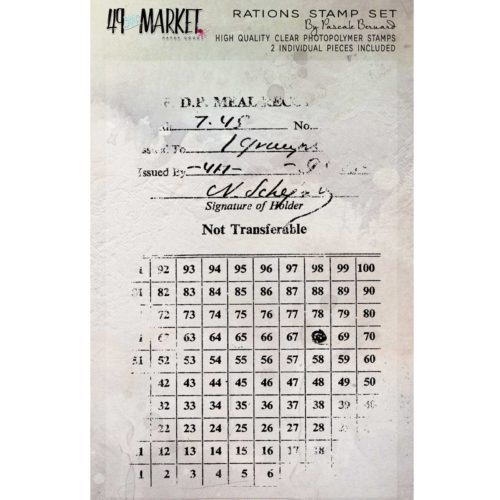
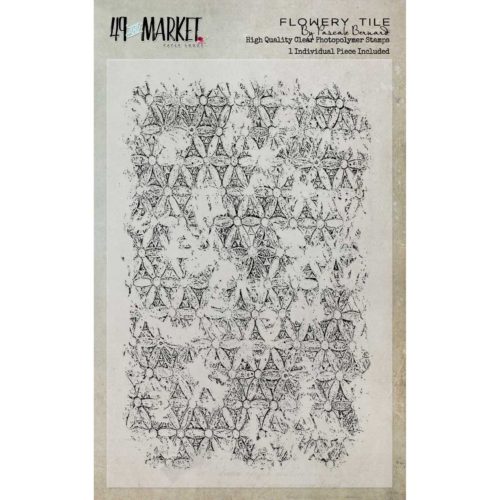
  • Stamps - 49 and MArket (Pascale's Tickets and Numbers, Pascale's Formula);
  • Art Extravagance - Finnabair Prima (Clear Crackle Paste);
  • Art Basics - Finnabair Prima (Heavy White Gesso, Clear Gesso, Soft Matte Gel).

dimanche 26 août 2018

In my garden - Maja Design DT

Bonjour à toutes,

Aujourd'hui, je suis pour la dernière fois sur le blog de Maja Design; Après quatre ans, il est temps pour moi de dire au revoir et ce n'est jamais facile. Mais rassurez-vous vous continuerez à me voir sur le net. Et pour mon dernier projet, j'ai réalisé une page avec les collections Vintage Basics : j'ai choisi les collections d'été (Summer) et de printemps (Spring). J'ai travaillé avec une de mes photos de familles: sur la photo, prise par mon grand-père maternel,  on peut y voir sa mère et son frère.

Hello Sweeties

Today, I'm up on Maja Design blog for the last time. After 4 years, it's time for me to say goodbye and it's never easy, but don't worry, you will continue to see me on the web. And for my last project, I made a layout featuring the Vintage Basics collections: I used the Summer and Spring collections. I work with another of my family treasure: on the photo, taken by my maternal grandfather, you can see his mother with his brother. 


J'ai commencé par tamponné le fond avec une encre marron foncée et plusieurs tampons. Une fois fini, j'ai protégé le fond d'une couche de gesso transparent.

First I stamped randomly with a dark brown ink and different stamps. When done, I primed the background with clear gesso.


J'ai mélangé une poudre magical brune avec de la pâte à craqueler blanche pour ajouter un motif à l'aide d'un pochoir. Pour donner l'effet d'un motif qui s'efface avec le temps, j'ai utilisé mon couteau pour enlever une partie du motif que j'ai laissé séché naturellemnt pour permettre aux craquelures d'apparaitre.

I mixed together a brown magical with white crackle paste to add a design with a stencil. To give the effect of a peeling design I used my palette knife to remove some part of the design, that I let dry naturally to allow the crackle to appear. 


Penadant ce temps, j'ai fait tramper les chipboards fleurs pour leur donner plus de texture. Je l'es délicatement écarter sur les bords pour leurs donner plus de volume. Apres séchage, je les ai protégés avec une couche de gesso blanc et j'ai utilisé des encres bleues et brunes pour ajouter un peu de couleurs.

In the meantime, I soaked some flower chipboards in order to give them more dimension and texture.  I gently pulled apart the edges to add more texture.  After drying, I primed them with white gesso and I used blue and brown inks to add some colors.


J'ai juste ajouté un peu de reflet or aux fleurs blanches et de l'encre brune aux feuilles. J'ai également coloré les chipboards feuilles avec l'encre brune ainsi qu'un mélange de différentes tailles de Art Stones.

I just added some gold shimmer to the white flowers and some brown ink to the leaves. I colored also some leaves chipboards with the brown ink as well as a mix of different sizes of Art Stones. 


Une fois la pâte à craqueler sèche, j'ai ajouté un peu de couleur avec les mêmes encres au fond. Puis j'ai coupé quelques papiers pour mettre sous la photo avant de coller tous les embellissements.

When the crackle paste was dry, I added some colors with the same inks to the background. Next, I cut a few papers to add under the photo before gluing all the embellishments.  


Pour terminer la mise en page, j'ai ajouter des glitters ultra-fin sur les chipboards fleurs et les Art Stones.
To finish the layout I add some ultra-fine glitters on top of the flowers chipboards and the Art Stones. 


Est ce que je vous ai dit que je me suis inspirée du superbe Mood board de Dusty Attic :


Did I tell you that I follow the beautiful August's Dusty Attic Moodboard : 


Matériels / Materials:

Maja Design papers:

Vintage-Summer-Basics-P

1946

1914
Vintage-Spring-Basics-P

1st of March

6th of March

Other products:

  • Flowers - 49 and Market (Garden Blooms - Alabaster);
  • Stamps - 49 and Market (Pascale's Form, Pascale's tickets and numbers);
  • Stencil - A.B. Studio (Stencil #94);
  • Chipboards - Dusty Attic (Foliage #3, Spring Blooms #3);
  • Inks - Lindy's Gang (Whale Watch Blue, Smokey Sapphire, Blazing Sun);
  • Magical - Lindy's Gang (Steampunk Sepia);
  • Art Ingredients - Finnabair Prima (Art Stones, Mini Art Astones, Mega Art Stone, Art Sugar: Antique Silver); 
  • Art Extravagance - Finnabair Prima (White Crackle Paste);
  • ArtBasics - Finnabair Prima (Clear Gesso, Heavy White Gesso, Soft Matte Gel, 3D Matte Gel).


Did you know Maja Design is on Social Media?

Pinterest: Did you know that Maja Design has a Pinterest Page? You can find it right here.
Facebook: You can follow us on Facebook right here and of course "LIKE" us.
Instagram: Maja also has an Instagram account – majadesigninsweden.
(Use the hashtag #majadesigninsweden or the tag @majadesigninsweden
with your Maja papers so we can find you.)
YouTubehttps://www.youtube.com/user/MajaDesignChannel

samedi 18 août 2018

Beautiful Day - 49 and Market DT

Bonjour à toutes,

Aujourd'hui je suis sur le blog de 49 and Market avec une nouvelle page réalisée avec la collection Sweet reflections. J'ai choisi de travailler avec ne photo de mon arrière grand-mère prise dans son jardin.

Hello Sweeties

Today I'm up on 49 and market blog with a new layout featuring the Sweet Reflections colletions. I worked with a phot of my great grandmother in her garden. 


J'ai tamponné ici et là le fond avec différents tampons. Ensuite, j'ai protégé le papier avec du gesso transparent, et une fois sec, j'ai ajoué un motif à l'aide de rub-on et d'une feuille or. Ensuite, j'ai également ajouté un motif à l'aide d'un pochoir et de pâte à craqueler transparente.

I stamped randomly the background with different stamps. Next, I primed the paper with clear gesso and, when dry, I added a design with adhesive rub-ons covered with a gold foil. Next, I added another design with a stencil and a clear crackle paste. 


Pendant que la pâte sécher, j'ai recouvert les chipboards de gesso blanc avec de les colorer avec des encres en spray. Puis j'ai tamponné le chipboard avec le set Flowery Tile et de la Versamark et je l'ai embossé.

While the paste was drying, I primed the chipboard with white gesso before coloring it with two spray inks. Next I stamped the chipboard with the Flowery Tile set with Versamark ink and embossed it. 


J'ai découpé quelques feuilles dans du papier aquarelle que j'ai coloré avec des encres brunes et vertes. Pendant que les encres étaient encore humide, j'ai saupoudré les "Sprig Leaves" avec une poudre à embosser jaune or pour leur donner un peu de texture.

I die cut some leaves in a watercolor paper which I colored with green and brown inks. While the inks were still wet I sprinkle the Sprig leaves with a yellow gold embossing powder to add some texture. 


Une fois la pâte à craqueler sèche, j'ai coloré le fond avec plusieurs encres brunes, vertes et jaunes or.

When the crackle paste was dry, I colored the background with differents inks: green, brown and yellow gold. 


Ensuite, j'ai coupé quelques papiers pour mettre sous la photo avant de coller l'ensemble des embellissements avec un gel très épais.

Next, I cut some papers to add under the photo and I glued all the embellishments with a heavy gel. 


Pour terminer la mise en page, j'ai ajouté des flocons de mica or.

To finish the layout I added some gold mica flakes. 

Matériels / Materials:

49 and Market products:

SR-87612 Sweet Reflections: Awakening
Sweet Reflections
Awekening
SR-87575 Sweet Reflections: Reminiscence
Sweet Reflections
Reminisence
SG-87216 Stargazers - Lemon Drop
Stargazers
Lemon Drop
PB-87681 Pascale's Rations Stamp Set
Pascale's Ration
Stamps Set
PB-87490-Flowery-Tile-Stamp
Flowery Tile
Stamp

Other products: 

  • Spray inks - Lindy's Gang (Mystic Malachite, Green With Envy Green);
  • Magical - Lindy's Gang (Grab a Guy Gold);
  • Embossing powders - Lindy's Gang (Sunset Yellow Orange, Oakleaf Olive);
  • Stencil - AB Studio (Stencil #88);
  • Die - Memory Box (Sprig Leaf, );
  • Chipboard - BFS (Quatrefoil Panel); 
  • Adhesive Rub-Ons - Prima (655350971380);
  • Rub-ons Foil Sheet - Prima (Intergalactic);
  • Art Ingredients - Finnabair Prima (Mica Flakes: Gold Leaf);
  • Art Extravagance - Finnabair Prima (Clear Crackle Paste);
  • Art Basics - Finnabair Prima (Clear Gesso, White Gesso, Soft Matte Gel, Heavy Body Gel).


dimanche 12 août 2018

Own your story - Maja Design DT

Bonjour à toutes,

Aujourd’hui je suis sur le blog de Maja Design avec une nouvelle page réalisée avec la collection Enjoying Outdoors. J'ai choisi de travailler avec une photo de ma maman.

Hello Sweeties

Today I'm up on Maja Design blog with a new layout featuring the Enjoying Outdoors collection. I chose a photo of my mom.


J'ai commencé par tamponné ici et là avec une encre brune le fond, puis j'ai protégé le papier avec du gesso transparent. J'ai mélangé de la pâte papier avec une peinture métallique. J'ai utilisé ce mélange pour ajouter un motif à l'aide d'un pochoir.

First, I stamped randomly with a brown ink the background, then I primed the paper with clear gesso. I mixed together paper paste and a metallic paint. I used this mix to add a design with a stencil.


Pendant que la pâte séchait, j'ai coloré quelques fleurs avec différentes peintures métalliques. J'ai découpé quelques feuilles dans du papier aquarelle que j'ai peint avec une encre verte et certaines des peintures que j'ai utilisé pour colorer les fleurs.

While the paste was drying, I colored some flowers with different metallic paints. I die cut some leaves in a watercolor paper and I colored them too with a green ink and some of the paints I used to color the flowers. 


J'ai peint le chipboard avec deux peintures acryliques. Pour faire la finition, j'ai ajouté une légère touche de cire or blanc.

I painted the chipboard with two acrylic paints. To finish it I added a light touch of white gold wax. 


La pâte sèche, j'ai coloré le fond et ajouté quelques tâches.

The paste dry, I colored the background and added some splatters as well.


Ensuite, j'ai coupé quelques papiers pour mettre sous la photo et j'ai collé l'ensemble des embellissements.

Next I cut some papers to add under the photo and I glued all the embellishments. 


Pour terminer la mise en page, j'ai ajouté des microbilles.

To finish the layout I added some microbeads. 

Maja Design papers:

Enjoying-Outdoors-P

Garden notes

Singing in the rain bs

Time for reflection

Harvest Time bs

Feeling good

Flourishing bs
Other products:
  • Magical - Lindy's Gang (Sea Grass Green);
  • Flowers - WOC (Chelsea Roses);
  • Flowers - 49 and Market (Garden Seeds: Cotton);
  • Stamp - 49 and Market (Pascale's Equations);
  • Stencil - Ab Studio (Stencil #93);
  • Chipboard - BFS (Turkish Panel);
  • Die - Memory Box (Climbing Vines)
  • Die - Magnolia Doohickey (Summer Foliage); 
  • Art Ingredients - Finnabair Prima (Microbeads: Berry);
  • Art Alchemy - Finnabair Prima (Frozen Berres, Plum Preserved, Dark Velvet, Soft Satin, Waxes: White Gold, Amethyst Magic);
  • Art Extravagance - Finnabair Prima (Paper Texture Paste); 
  • Art Basics - Finnabair Prima (Clear Gesso, Soft Matte Gel, Heavy Body Gel).


Where can you purchase MajaDesign Papers?

MajaDesign collections are sold all around the world - 33 countries and growing with new stores being added often. Are you looking for a store location that sells Maja collections? Here is a helpful Store Finder link to help you shop. If your favorite store is not on this list, consider asking them to carry MajaDesign.

jeudi 2 août 2018

Explore - 49 and Market DT

Bonjour à toutes,

Aujourd'hui je suis sur le blog de 49 and Market avec une nouvelle page réalisée avec la collection Captured Adventures.

Hello Sweeties,

Today I'm up on 49 and Market blog with a new layout featuring the Captured Adventures collection.


J'ai commencé par coller quelques morceaux de papiers sur le fond pour ajouter un peu de texture. Une fois satisfaite, J'ai tamponné ic e là avec divers tampons des sets Captured Adventures et les Flowery Tiles. Ensuite, j'ai protégé le fond avec une couche de gesso transparent.

First I cut some pieces of papers that I glued to the background to add texture. When happy, I stamped randomly with different stamps from the Captured Adventures stamp sets and the Flowery Tiles Stamp. Next, I primed everything with clear gesso. 


Ensuite, j'ai coloré le fond avec plusieurs tons de brun, vert et rose qui rappelent les couleurs de la photo. Puis j'ai ajouté un motif à l'aide d'un pocoir et de deux pâtes à craqueler: blanche et transparente.

Next, I colored the background with shades of brown, green and pink to match the photo. Then, I added a design with a stencil and clear and white crackle pastes.


Pendant que les pâtes séchaient, j'ai découpé des feuilles dans du papier aquarelle que j'ai coloré ainsi que les fleurs avec des encres vertes et roses.

While the pastes were drying, I die cut some leaves in a watercolor paper. I colored them as well as the flowers with green and pink inks.


Une fois, les pâtes séches, j'ai rajouté de la couleur au fond.

When the pastes were dry, I added more colors to the background. 


J'ai coupé quelques papiers pour mettre sous la photo. Puis,, j'a ajouté du fil noir avant de coller tous les embellissements.

I cut a few papers to add under the photo. Then, I added some black thread before gluing all the embellishments. 


POur finir la mise en page, j'ai ajouté des flocons de mica et des microbilles.

To finish the layout, I added some mica flakes and microbeads. 

Matériels / Materials:

49 and Market products: 

CA-87407-Boldly-Go
Captured Adventures
Boldly Go
CA-87384-Vagary
Captured Adventures
Vagary
CA-87452-6x6-Collection-Pack-Captured-Adventures
Captured Adventures
6x6 Paper Pack
CA-87438-Captured-Adventure-Laser-Cuts
Captured Adventures
Laser Cut Sheet
BB-86950-Botanical-Blends-Snow
Botanical Blends
Snow
CA-87469-Captured-Adventures-Stamp-Set-1
Captured Adventures
Stamp Set 1
CA-87476-Captured-Adventures-Stamp-Set-2
Captured Adventures
Stamp Set 2
PB-87490-Flowery-Tile-Stamp
Flowery Tiles
Stamp

Other products: 

  • Inks - Lindy's Gang (Raspberry Lemonade, Open Arms Amethyst, Green with Envy Green, Long John's Silver);
  • Magical - Lindy's Gang (Cathedral Pines Green);
  • Stencil - A.B. Studio (Stencil #66);
  • Die - Prima (Leaves);
  • Art Ingredients - Finnabair Prima (Pebbles, Mica Flakes: Granit, Microbeads: Silver);
  • Art Extravagance - Finnabair Prima (White Crackle Paste, Clear Crackle Paste);
  • Art Basics - Finnabair Prima (Clear Gesso, Soft Matte Gel, 3D Matte Gel).


Related Posts Plugin for WordPress, Blogger...