Affichage des articles dont le libellé est A.B. Studios. Afficher tous les articles

dimanche 26 août 2018

In my garden - Maja Design DT

Bonjour à toutes,

Aujourd'hui, je suis pour la dernière fois sur le blog de Maja Design; Après quatre ans, il est temps pour moi de dire au revoir et ce n'est jamais facile. Mais rassurez-vous vous continuerez à me voir sur le net. Et pour mon dernier projet, j'ai réalisé une page avec les collections Vintage Basics : j'ai choisi les collections d'été (Summer) et de printemps (Spring). J'ai travaillé avec une de mes photos de familles: sur la photo, prise par mon grand-père maternel,  on peut y voir sa mère et son frère.

Hello Sweeties

Today, I'm up on Maja Design blog for the last time. After 4 years, it's time for me to say goodbye and it's never easy, but don't worry, you will continue to see me on the web. And for my last project, I made a layout featuring the Vintage Basics collections: I used the Summer and Spring collections. I work with another of my family treasure: on the photo, taken by my maternal grandfather, you can see his mother with his brother. 


J'ai commencé par tamponné le fond avec une encre marron foncée et plusieurs tampons. Une fois fini, j'ai protégé le fond d'une couche de gesso transparent.

First I stamped randomly with a dark brown ink and different stamps. When done, I primed the background with clear gesso.


J'ai mélangé une poudre magical brune avec de la pâte à craqueler blanche pour ajouter un motif à l'aide d'un pochoir. Pour donner l'effet d'un motif qui s'efface avec le temps, j'ai utilisé mon couteau pour enlever une partie du motif que j'ai laissé séché naturellemnt pour permettre aux craquelures d'apparaitre.

I mixed together a brown magical with white crackle paste to add a design with a stencil. To give the effect of a peeling design I used my palette knife to remove some part of the design, that I let dry naturally to allow the crackle to appear. 


Penadant ce temps, j'ai fait tramper les chipboards fleurs pour leur donner plus de texture. Je l'es délicatement écarter sur les bords pour leurs donner plus de volume. Apres séchage, je les ai protégés avec une couche de gesso blanc et j'ai utilisé des encres bleues et brunes pour ajouter un peu de couleurs.

In the meantime, I soaked some flower chipboards in order to give them more dimension and texture.  I gently pulled apart the edges to add more texture.  After drying, I primed them with white gesso and I used blue and brown inks to add some colors.


J'ai juste ajouté un peu de reflet or aux fleurs blanches et de l'encre brune aux feuilles. J'ai également coloré les chipboards feuilles avec l'encre brune ainsi qu'un mélange de différentes tailles de Art Stones.

I just added some gold shimmer to the white flowers and some brown ink to the leaves. I colored also some leaves chipboards with the brown ink as well as a mix of different sizes of Art Stones. 


Une fois la pâte à craqueler sèche, j'ai ajouté un peu de couleur avec les mêmes encres au fond. Puis j'ai coupé quelques papiers pour mettre sous la photo avant de coller tous les embellissements.

When the crackle paste was dry, I added some colors with the same inks to the background. Next, I cut a few papers to add under the photo before gluing all the embellishments.  


Pour terminer la mise en page, j'ai ajouter des glitters ultra-fin sur les chipboards fleurs et les Art Stones.
To finish the layout I add some ultra-fine glitters on top of the flowers chipboards and the Art Stones. 


Est ce que je vous ai dit que je me suis inspirée du superbe Mood board de Dusty Attic :


Did I tell you that I follow the beautiful August's Dusty Attic Moodboard : 


Matériels / Materials:

Maja Design papers:

Vintage-Summer-Basics-P

1946

1914
Vintage-Spring-Basics-P

1st of March

6th of March

Other products:

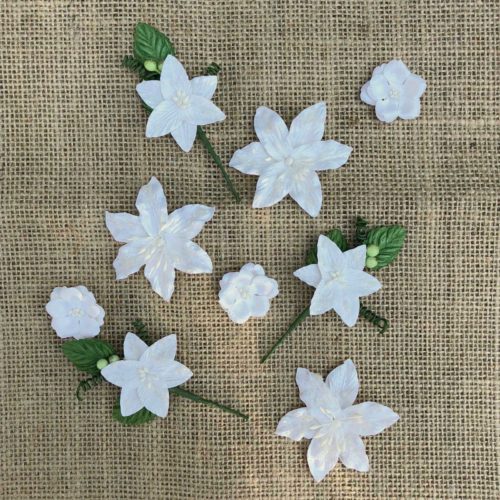
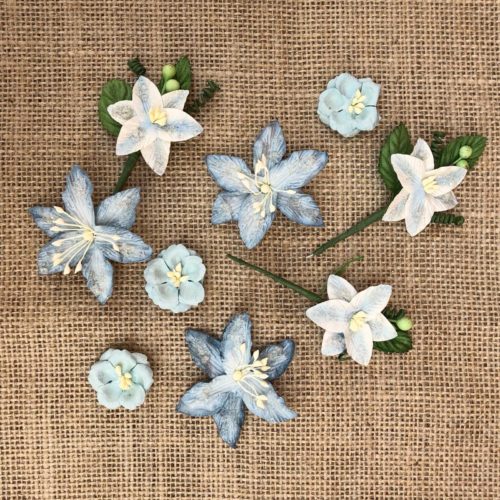
  • Flowers - 49 and Market (Garden Blooms - Alabaster);
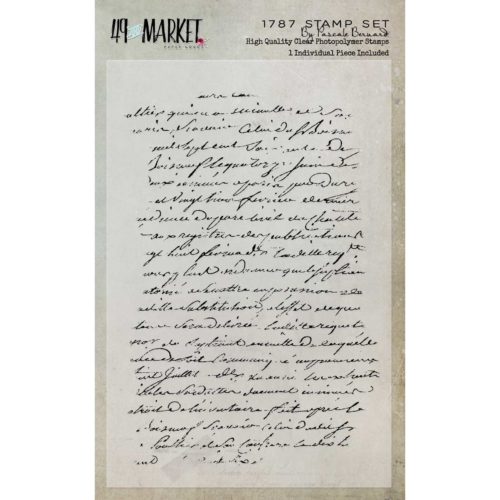
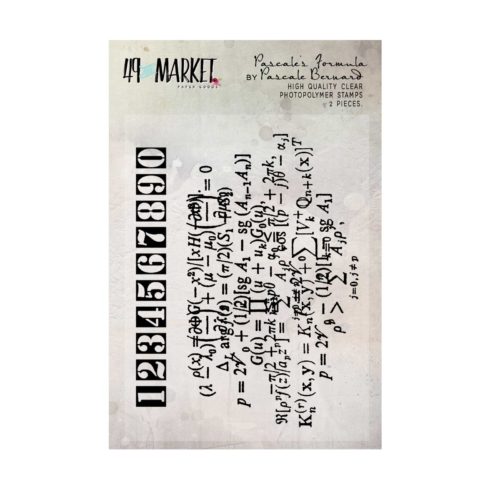
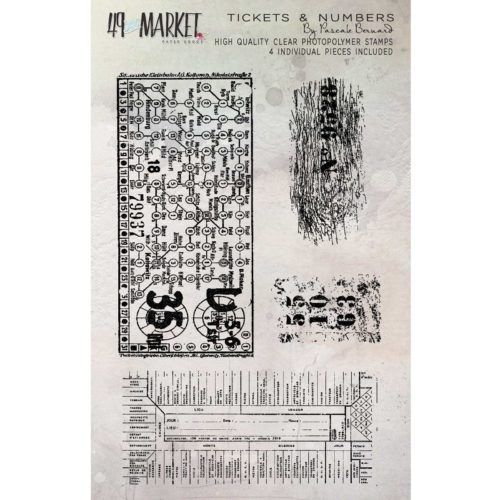
  • Stamps - 49 and Market (Pascale's Form, Pascale's tickets and numbers);
  • Stencil - A.B. Studio (Stencil #94);
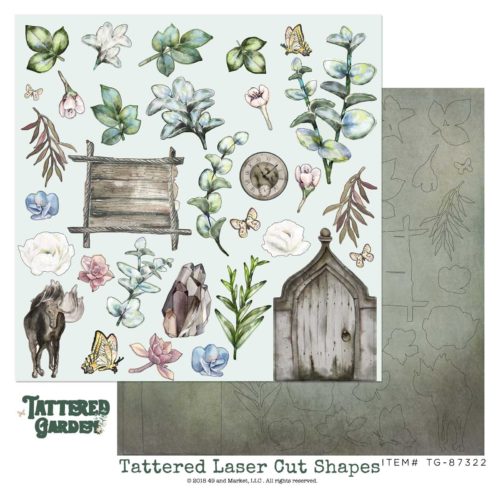
  • Chipboards - Dusty Attic (Foliage #3, Spring Blooms #3);
  • Inks - Lindy's Gang (Whale Watch Blue, Smokey Sapphire, Blazing Sun);
  • Magical - Lindy's Gang (Steampunk Sepia);
  • Art Ingredients - Finnabair Prima (Art Stones, Mini Art Astones, Mega Art Stone, Art Sugar: Antique Silver); 
  • Art Extravagance - Finnabair Prima (White Crackle Paste);
  • ArtBasics - Finnabair Prima (Clear Gesso, Heavy White Gesso, Soft Matte Gel, 3D Matte Gel).


Did you know Maja Design is on Social Media?

Pinterest: Did you know that Maja Design has a Pinterest Page? You can find it right here.
Facebook: You can follow us on Facebook right here and of course "LIKE" us.
Instagram: Maja also has an Instagram account – majadesigninsweden.
(Use the hashtag #majadesigninsweden or the tag @majadesigninsweden
with your Maja papers so we can find you.)
YouTubehttps://www.youtube.com/user/MajaDesignChannel

mercredi 1 août 2018

Mom and the bags - Lindy's Gang DT

Bonjour à toutes,

Aujourd'hui j suis sur le blog de Lindy's Gang avec une nouvelle page imspirée par le combo de couleur d'août. J'ai choisi de travailler avec une photo de ma mère.

Hello Sweeties

Today I'm up on Lindy's Gang blog with a new layout inspired by the August's color combo. I chose a photo of my mother.


Et voici le combo de couleur :


And here is the color combo:  


J'ai commencé par tamponner ici et là avec divers tampons et une encre Archival noire. Ensuite, j'ai protégé le fond avec du gesso transparent.

First I stamped randomly the background with different stamps and a black Archival ink. Next, I primed the paper with clear gesso.   


J'ai ajouté un premier motif avec l'encre Pop Rock Purple et un pochoir. Puis, j'ai légérement décaler le pochoir avant d'ajouter de l'encre Blue Hawaiian Blue. Ensuite, j'ai ajouté un deuxième motif avec un autre pochoir et deux pâtes à craqueler : transparente et platine.

I added the first design with the Pop Rock Purple ink with a stencil. Then I move the stencil a little and repeat the process with the Blue Hawaiian Blue Magical. Next, I added the second design with another stencil and two crackle pastes: clear and platinum.


Pendant que les pâtes séchaient, j'ai coloré quelques fleurs avec les encres Pop Rock Purple et Château Rose. J'ai également quelques feuilles que j'ai découpé dans du papier aquarelle, avec des ebcres vertes. Pendant que les encres étaient encore humide, je les ai saupoudré de poudre à embosser Weeping Willow Green Gold et je les ai embossé.

While the pastes were drying, I colored some flowers with the Pop Rock Purple and Château Rose inks. I colored also some leaves I die cut in a watercolor paper with green inks. While the inks were still wet I sprinkle the Weeping Willow Green Gold EP and embossed it. 


J'ai coupé quelques papiers pour mettre sous la photo avant de coller les embellissements.

I cut a few papers to add under the photo before gluing all the embellishments.


Pour terminer la mise en page, j'ai ajouté des microbilles et des flocons de mica.

To finish the layout, I added microbeads and mica flakes.

Matériels / Materials:

Lindy's Gang products: 
Other products:
  • Flowers - 49 and Market (Garden Seeds: Cotton, Botanical Blends: Snow);
  • Stamps -  49 and Market (Pascale's Ration, 1787);
  • Papers - AB Studio (In Wonderland);
  • Stencils - AB Studio (Stencil #88, Stencil #85);
  • Art Ingredient - Finnabair Prima (Microbeads: Bronze, Mica Flakes: Gold)
  • Art Extravagance - Finnabair Prima (Clear Crackle Paste, Platinum Crackle Paste);
  • Art Basics - Finnabair Prima (Clear Gesso, Soft Matte Gel, 3D Matte Gel).

lundi 30 juillet 2018

1956 - Lindy's Gang

Bonjour à toutes,

Aujourd'hui, je suis sur le blog de LIndy's Gang avec une nouvelle page réalisée sur une feuille transparente. J'ai choisi une photo de mon père.

Hello Sweeties

Today, I'm up on lindy's Gang blog with a 
layout made on a clear acrylic sheet with step-by-step photos and a video tutorial. I chose a photo of my father.


J'ai mélangé la poudre Whale Watch Blue avec du gel mbrillant pour ajouter le premier motif avec l'un de mes nouveaux pochoirs.
Ensuite, j'ai mélangé de la poudre Steampunk Sepia avec de la pâte à craqueler blanche pour ajouter le deuxième motif avec un deuxième motif.

I mixed the Whale Watch Blue Magical with a soft gloss gel to add the first design with one of my new stencil.
Next, I mixed the Steampunk Sepia Magical with a white crackle paste to add the second design with another stencil.


J'ai dilué le mélange bleu avec de l'eau pour ajouter des tâches et j'ai fait une mélange similaire avec le Steampunk Sepia pour ajouter également des tâches marron. J'ai mis la page de côté pour permettre à l'ensemble de sécher naturellement.
Pendant ce temps, j'ai préparé les papiers qui iront sous la photo. J'ai vaporisé une papier aquarelle avec les encres Whale Watch Blue et Long John's Silver.

I watered down the blue mix with water to add some splatters and I make another mix with the Steampunk Sepia to add brown splatters as well. I put the layout aside to allow everything to dry on its own. 
In the meantime, I prepared the papers that will go under my photo. I sprayed a watercolor paper with the Whale Watch Blue and the Long John's Silver inks.


Une fois les encres séches, j'ai tamponné de manière aléatoire avec differents tampons et une encre Archival.
J'ai coupé le papier aquarelle et j'ai ajouté différents motifs sur chaque morceau : le premier avec le mélange bleu, le deuxième avec l'encre Long Jonh's Silver et e dernier avec de la Javel pour l'éclaircir.

When the inks were dry, I stamped randomly with different stamps and an Archival ink.
I cut the watercolor paper, and I add different designs to the 3 pieces: one with the blue mix, the second with the Long Jonh's Silver ink and the last one was stamped with bleach to tone down the color.


Ensuite j'ai coloré quelques feuilles découpées dans du papier aquarelle, avec plusieurs Magicals. Pour les branches, j'ai utilisé Afternoon Delight Denim et Black Forest Black, et pour les feuilles, j'ai utilisé Sea Grass Green, Whale Watch Blue et Steampun Sepia.

Next, I colored some leaves I die cut in a watercolor paper with several Magicals. For the branches, I used Afternoon Delight Denim and Black Forest Black, and for the leaves, I used Sea Grass Green, Whale Watch Blue, and Steampunk Sepia.
While the inks were still wet, I wanted to add some texture to the leaves. I sprinkled them with Starbright Gold Green and Orbit Olive Green Gold embossing powders that I heated set.


Le fond sec, j'ai collé tous les embellissements avec du gel Heavy Body.
POur terminer la mise en page, j'ai ajouté des microbilles et des glass glitters.

The background dry, I glued all the embellishments with a heavy body gel.
To finish the layout, I added some glass glitters and microbeads.


Quelques gros plans / Some close-ups:


Matériels / Materials:

Lindy's Gang products:
Other products:
  • Sheet - Clear Scrap (Clear Acrylic sheet);
  • Stencils - AB Studio (Stencil #92, Stencil #94);
  • Stamps- 49 and Market (1787, Pascale's Formula, Pascale's Ration, Pascale's Tickets);
  • Flowers - 49 and Market (Blossom Blends: Linen, Garden Seeds: Linen);
  • Laser cut - 49 and Market (Captured Adventures);
  • Mechanical - Finnabair Prima (Wings);
  • Art Ingredients - Finnabair Prima (Microbeads: Bronze; Glass Glitter: Copper; Pebbles);
  • Art Extravagance - Finnabair Prima (White Crackle Paste);
  • Art Basics - Finnabair Prima (Soft Matte Gel, Soft Gloss Gel, Heavy Body Gel).


mercredi 18 juillet 2018

Time after time - 49 and Market DT

Bonjour à toutes,

Aujourd'hui je suis sur le blog de 49 and Market avec une nouvelle page réalisée avec la collection Tattered Garden. J'ai choisi de travailler avec une photo que j'ai prise durant un évenement au château de l'Islette (Touraine, France).

Hello Sweeties

Today I'm up on 49 and Market blog with a new layout featuring the Tattered Garden collection. I chose a photo I've taken during an event at the castle of L'Islette (Loire Valley, France)


J'ai tamponné ici et là avec le tampon 1787 et de l'encre noire avant de protéger le fond avec du gesso transparent.

I stamped randomly with a black ink and the 1787 stamp before priming the background with clear gesso.


Ensuite, j'ai mélanger de la pâte Platnium avec deux Primary Elements pour obtenir la bonne couleur. Puis j'ai ajouté un motif àl'aide d'un pochoir et du mélange.

Next, I mixed some Platinum crackle paste with two Primary Elements to obtain the right color. Next, I added a design with a stencil and the mix crackle paste.


Une fois la pâte séche, j'ai fait des taches avec plusieurs peintures métalliques.

When the paste was dried, I splattered different metallic paints.


J'ai peint quelques fleurs avec des plusieurs peintures métalliques. J'ai coloré les chipboards avec des cires.

I painted some flowers with different metallic paints. I colored the Archival Board with waxes.


J'ai coupé quelques papiers pour ajouter sous la photo, puis, j'ai collé tous les embellissements: les chipboards, les fleurs, et diverses découpes laser de la feuille Tattered.

I cut a few papers to add under the photo. Then I glued all the embellishments: the Archival board, the flowers, and different elements from the Tattered laser cut sheet. 


Matériels / Materials:

49 and Market products:

TG-87254-Tattered-Leaves
Tattered Leaves
TG87247-Tattered-Path
Tattered Path
TG-87322-Tattered-Laser-Cut-Outs
Tattered Laser Cut Sheet 
SG-87230 Stargazers - Simply White
Stargazer
Simply White
PB-87506-1787-Pascale-Stamp
1787
Stamp set
AB-86738 6x6 Archival Board - Timeless (White)
Archival Board
Timeless (White)

Other products:
  • Stencil - A.B. Studio (Stencil #64);
  • Primary Element - ColourArte (Mocha Rose, English Lavender);
  • Art Alchemy - Finnabair Prima (Metallique: Plum Preserve, Soft Satin; Sparks: Magic Potion; Waxes: White Gold, Rose Gold);
  • Art Extravagance - Finnabair Prima (Platinum Crackle Paste);
  • Art Basics - Finnabair Prima (Clear Gesso, 3D Matte Gel).

lundi 16 juillet 2018

Escape - More than words

Bonjour à toutes,

Aujourd'hui je suis sur le blog de More than Word avecl'équipe créative de 49 and Market.

Hello Sweeties,

Today I'm up on More than Word blog with my teammate from 49 and Market. 


Et voici le challenge du mois:
Mot - Plage
Challenge créatif - Coquillage
Quand j'ai vu le challenge de MTW, j'ai immédiateemnt pensé à la plage Coral Beach que j'a visité le mois dernier en Irlande. C'est ue petite ile ù le sable est constitué de petits morceaux de corail. J'ai même

Here is the Main Challenge:

Word inspiration - Beach
Creative challenge - Seashells
When I saw the MTW challenge, I have immediately thought of the Coral Beach I visited last month in Ireland. It is a small beach where the sand is made of tiny pieces of coral. I had even added some coral bits on my layout.


J'ai commencé par tamponner ici et là avec deux tampons. Ensuite, j'ai protégé le fond d'une couche de gesso transparent.

First, I added some random stamping with two stamps. Next, I primed the background with clear gesso. 


J'ai ajouté de la couleur avec diverses nuances de bley pour obtenir une couleur simlaire à l'eau e la photo.

I added some color with different shades of blue to match the color of the water of the photo. When happy, I added a design with a stencil and modeling paste.


Pendant que la pâte séchait, j'ai coloré des coquillages que j'a fait en papier maché;

While the paste was drying, I colored and embossed some seashells I made with paper clay. I colored also some chipboards with the Rust Effect paste. 


J'ai coupé quelques papiers pour mettre sous la photo. Puis j'ai collé tous les embellissements avec un gel 3D mat.

I cut a few papers to add under the photo. Then I glued all the embellishments with a 3D Matte Gel.


Pour terminer la mise en page, j'ai ajouté du corail que j'avais ramassé sur Coral Beach.

To finish the layout, I added some coral I had collected on Coral Beach.

Matériels / Materials:

49 and Market products:


CA-87353 Far Away Land
Captured Adventures
Far Away Land
CA-87452 6x6 Collection Pack Captured Adventures
Captured Adventures
6x6 Collection Pack
AB-86691 6x6 Archival Board - Escape (White)
Archival Board
Escape (White)
SG-87179 Stargazers - Sky Blue
Stargazers
Sky Blue
PB-87711 Pascales 3x4 Formula stamp set
Pascale's Formula
stamp set
PB-87698 Pascale's Tickets and Numbers Stamp Set
Pascale's Tickets and Numbers
Stamp Set

Other products:

  • Inks - Lindy's Gang (Bachelor Button Blue, Azure Sea Asters, Tainted with Love Teal);
  • Magicals - Lindy's Gang (Fuzzy Navel Peach, Bavarian Blue, Afternoon Delight Denim);
  • Embossing Powder - Lindy's Gang (Byzantine Bronze);
  • Stencil - AB STudio (Stencil #66);
  • Art Extravagance - Finnabair Prima (Rust Effect Paste); 
  • Art Basics - Finnabair Prima (Clear Gesso, Modeling Paste,3D Matte Gel).

Related Posts Plugin for WordPress, Blogger...