
Bonjour à toutes,
Aujourd'hui, c'est un vidéo tutoriel que je vous propose pour la réalisation de cette page pour A.B. Studio.
Hello Sweeties,
Today I have a video tutorial for A.B. Studio to share with you.
Aujourd'hui, c'est un vidéo tutoriel que je vous propose pour la réalisation de cette page pour A.B. Studio.
Hello Sweeties,
Today I have a video tutorial for A.B. Studio to share with you.

Processus / Basic process:
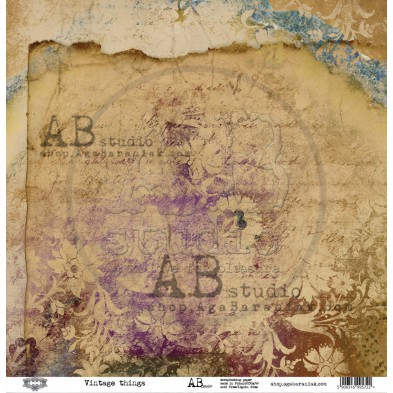
Quelques gros plans / Some close-ups:- Tamponner ici et là avec des encres marron et noire et des tampons texte la feuille Vintage Things ;
Stamp randomly with black and brown ink and two text stamps the Vintage Things sheet; - Protéger ensuite le fond d'une couche de gesso transparent ;
Prime the background with clear gesso; - Mélanger du gel 3G brillant et une poudre Magical bleue;
Mix 3D Gloss and a blue Magical; - Utiliser cette pâte et de la Icing paste Gold Vintage pour ajouter un motif avec le pochoir n°126;
Use this paste and Vintage Gold Icing paste together with stencil ID-126 to add a design; - Découper quelques napperons dans la feuille New Horizons ;
Die-cut some doily in the New Horizons sheet; - Tamponner un papier aquarelle avec les feuilles du set Flower Power, les colorer avec une encre marron, et enfin découper les ;
Stamp a watercolor paper with the leaves from the Flower Power set, color them with brown ink, and fuzzy cut them; - Colorer quelques fleurs avec une encre violette assortie au papier;
Color some flowers with a purple ink that match the paper;

- Tamponner l'emballage des fleurs avec le tampon Tickets (n°209) ;
Stamp the flowers' packaging with the ticket stamp (ID-209);

- Tamponner une feuille de Rhodoïd avec le tampon négatif (n°66) ;
Stamp an acetate sheet with the film strip stamp (ID-66);

- Découper des feuilles et des branches dans du papier
Die-cut leaves and branches in a watercolor paper; - Colorer les divers éléments avec des encres marron, bleu, et violette ;
Color the different elements with brown, blue, and purple inks; - Une fois tout prêt, coller les embellissements ;
When everything is ready, time to glue everything; - Chauffer les faux négatifs avec le heat gun pour leur donner une forme avant de les coller ;
Heat the film strips to shape them before gluing them; - Ajouter un peu de couleur autours des embellissements avec les mêmes encres ;
Add some color around the embellishments with the same inks ; - Finir la mise en page avec des glass glitter et des microbilles.
Finish the layout with glass glitters and microbeads.


Et la vidéo / And the step-by-step video:
Matériels / Materials:
A.B. Studio products:
 Vintage Things |  Take Me There New Horizons |  Stencil ID-126 |  Flower Power Stamp Set |
 Stamp ID-204 |  Stamp ID-208 | 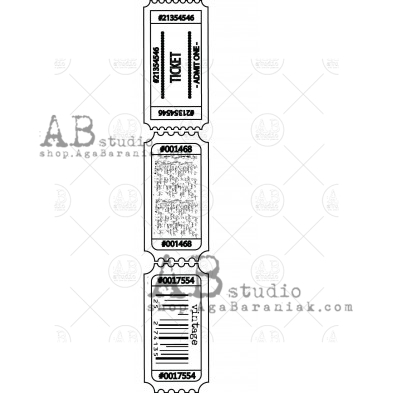 Stamp ID-209 |  Stamp ID-66 |
Other products:
- Moon Shadow Mist - Lindy's Gang (Smoky Sapphire);
- Starburst - Lindy's Gang (Open Arms Amethyst; Whale Watch Blue);
- Magical - Lindy's Gang (Whale Watch Blue (Nantucket Pearls Set));
- Flowers - 49 and Market (Cotton Blooms: Cloud; Mini Serie 01: Sky);
- Die - Prima (Pineapple Doily);
- Art Ingredients - Finnabair Prima (Glass Glitters: Gold Rush; Microbeads Set);
- Art Extravagance - Finnabair Prima (Icing Paste: Vintage Gold);
- Art Basics - Finnabair Prima (Clear Gesso, 3D Gloss Gel, Soft Gloss Gel).

This is truly breath taking gorgeous!
RépondreSupprimer